Growing Green Kale Sprouts

Growing Green Kale Sprouts
$0.00 / Units
In stock
Max allowed quantity 10

FREE Shipping on domestic orders $120+

Growing Instructions

Soak 3 Tbs. of seed in cool water for 4-12 hours.

Drain off soak water. Do not ever soak again.

Rinse thoroughly.

Drain Thoroughly.

Rinse and Drain with cool water every 8-12 hours.

On day 3, move your Sprouter to indirect sunlight.

Continue to Rinse and Drain every 8-12 hours.

Harvest on day 5 or 6, when the leaves are open and most of them are green.

De-Hull your crop if you like, before Refrigerating.

When conditions are warm your sprouts will likely grow faster. If their leaves open sooner you should green and de-hull and harvest sooner. Likewise they may grow slower if conditions are very cool. These are just tiny plants - they are not difficult to understand. The more you sprout the better you'll know them and be able to adjust to their needs. As always 70° is optimal and 70° is what our instructions are written for.

All sprouts generate heat while growing, which is a good thing, but it can get out of hand on occasion. When the weather is especially hot and humid you will do well to Rinse more frequently (every 8 hours if possible) using colder water than usual (the coldest your tap can offer is fine), to compensate.

Depending on your sprouting device, not all of your sprouts will have access to light and so some will not green. This is not only OK - it is good. The yellow sprouts will be equally nutritious (they have everything but chlorophyll) and many think them more delicious (in Europe vegetables are often grown "blanched" by avoiding light). We think they are prettier when there is a mix of green and yellow to go with the white roots. So don't sweat it - just eat more sprouts!

It is ESSENTIAL that you keep Brassica sprouts from clumping together and you CAN NOT grow them vertically using a tray sprouter. Brassica sprouts will mat together forming a dense bluish root mass which not only is unattractive but shortens the shelf life of the finished sprouts. So mix ‘em up! We use high water pressure when Rinsing to keep our brassica sprouts loose, but this only works for so long - so - when water isn't enough, break the clump of sprouts up using a fork or your fingers (wash your hands first please, if they need it). If you are using a sprouter that can hold water, fill it mostly full then use a fork to loosen. You can also dump your sprouts onto or into something and just shake them apart. You should never be afraid** of touching your sprouts. They are much stronger then they appear - just be reasonably gentle.

** The only thing to fear is fear itself.

Yields approximately 3 Cups (1/2 lb.) of Sprouts

Prep 3 Tablespoons of seed* then transfer (if necessary) into a bowl or into your Sprouter. Add 2-3 times as much cool (60°-70°) water. Mix seeds up to assure even water contact for all. Note: brassicas tend to float. Try to sink those that do by knocking them down with your fingers. It isn't a big deal but it is a good habit.

Allow seeds to Soak for 6-12 hours. Empty the seeds into your sprouter (if necessary). Drain off the soak water. You may water plants or use it in stock if you like - it has nutrients in it. Rinse thoroughly with cool (60°-70°) water. Drain thoroughly!

Set your Sprouter anywhere out of direct sunlight and at room temperature (70° is optimal) between Rinses. This is where your sprouts do their growing. We use a counter top - in the corner of our kitchen, but where the sprouter won't get knocked over by cats, dogs, kids or us. We don't mind the indirect sunlight or the 150 watts of incandescent light, because light just does not matter much. A plant can only perform photosynthesis when it has leaves. Until a plant has leaves, light has little if any effect. Sprouts also happen to like air-circulation, so don't hide your sprouts. This will be plenty of light when the sprouts are ready for it.

Rinse and Drain again every 8-12 hours for 3 days. As long as you grow you have to keep the sprouts happy!

Always be sure to Drain very thoroughly. The most common cause of inferior sprouts is inadequate drainage. Most sprouters look like they will not hold water, but even the best designed device does, so pay special attention to this step.

Note: These wonderful little brassica plants have a unique root structure. Brassicas will show microscopic roots starting around day 3. They are called root hairs and are most visible just before Rinsing when the sprouts are at their driest. When you Rinse, the root hairs will collapse back against the main root. These root hairs impress many people as mold - but they are not. Now you know!

Greening On the 4th day relocate your sprouts if necessary. If you've been keeping them away from light, move them. Avoid direct sun - it can cook your sprouts. Indirect sunlight is best but virtually any light will do. Experiment - you will be amazed at how little light sprouts require to green up. Photosynthesis is a marvel!

Continue to Rinse and Drain every 8-12 hours. As long as you grow you have to keep the sprouts happy.

Finishing Your sprouts will be done during day 5 or 6. The majority of sprouts will have open leaves which will be green if you exposed them to light.

De-Hull Before your final Rinse; remove the seed hulls. Brassica sprout hulls are quite large (relative to the seed and sprout) and they hold a lot of water (which can dramatically lessen the shelf life of your sprouts), so we remove them Thusly:

Transfer the sprouts to a big (at least 2 times the volume of your sprouter) pot or bowl, fill with cool water, loosen the sprout mass and agitate with your hand. Skim the hulls off the surface and compost them. Return the sprouts to your sprouter for their Rinse and Drain. You can also use our Dehuller (a small salad spinner with an excellent design that minimizes the sprouts that escape in the dehulling process). That's the short course - here is the full lesson. Better yet, here is a video on de-hulling.

Harvest If you Dehulled with our Dehuller, or used a salad spinner after dehulling in a bowl, you can go right to refrigeration. If not... Your sprouts are done 8-12 hours after your final Rinse. After the De-Hulling and the final Rinse we need to Drain very thoroughly and let our sprouts dry a bit. If we minimize the surface moisture of our sprouts they store much better in refrigeration, so we let them sit for 8-12 hours....

Refrigerate Transfer the sprout crop to a plastic bag or the sealed container of your choice. We have Produce Storage Bags that will extend shelf life substantially.

* If using Sproutpeople's Single Harvest Pack - use the whole bag. It will produce a crop of approximately 8 ounces.

These seeds yield approximately 5:1 - which means the sprouts will weigh 5 times as much as the seed you start with, but, they will increase even more in volume - so don't start with more than 3.5 Tablespoons per quart/litre of sprouter capacity.

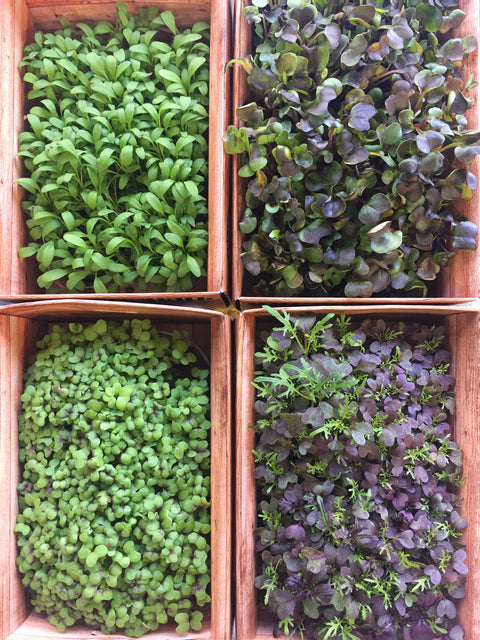
Micro-Greens Note:

You can also grow Kale as a Micro-Green as described on our Kale Greens page.

The seed of most Brassicas is virtually identical, but this is Green Kale seed.

After an 8 hour Soak, followed by their first Rinse and thorough Draining.

In case you are wondering, we are looking into an Easy Sprout, in which our Kale is sprouting.

12 hours later, following another Rinse and thorough Draining.

Another 12 hours later, following another Rinse and thorough Draining.

Yet another 12 hours passes....
I think you get the idea - every 12 hours you Rinse and Drain thoroughly.
Be sure to click the Video tab, and watch our scintillating bit of cinema that lives there.
It'll help you grasp fully what I mean by Thorough.

If you are sprouting in a hot and humid place/time, add a 3rd Rinse/Drain to your daily schedule (8 hours apart of course) - from the time you start and until your crop is done. Sprouts generate a lot of heat as they grow, and Brassicas are cool weather crops, so they especially like to be cooled down.

A mere 12 hours later.

This is actually only 11 hours later =;-)

And again - 12 hours later.

12 hours pass....

12ish hours later.
You can harvest now if you wish.
It is a good idea to De-Hull your crop.
If you are going to De-Hull without a Salad Spinner, be sure to Drain especially thoroughly, so your crop can dry adequately before Refrigerating.

12 hours ago (when that last picture was taken) I De-Hulled my crop using the Bowl Method (described 1/2 way down our De-Hulling page), so I Drained especially thoroughly after returning my Kale Sprouts to my Easy Sprout.
Now I can snap the Solid Lid onto my Easy Sprout, or put my sprouts in a plastic bag (or better), and put 'em in the fridge. But, I'm gonna eat some first!

I can't decide if I should make a grilled cheese on my homemade sourdough...

or a salad.

Maybe I'll have both =:-D

Family: Brassicaceae/ Cruciferae
Genus: Brassica
Species: oleracea
Cultivar: Unnamed

Recommended Sprouters

  1. Easy Sprout Sprouter

    Easy Sprout Sprouter

    Rating:
    99%
    $16.30
  2. Sprouting Jar - 1 Quart

    Sprouting Jar - 1 Quart

    Rating:
    100%
    $8.35
  3. 3 Screen Lid Set

    3 Screen Lid Set

    Rating:
    100%
    $16.85
  4. Euro Tray Sprouter

    Euro Tray Sprouter

    Rating:
    100%
    $40.40 / Units
  5. Stainless Steel Sprouter

    Stainless Steel Sprouter

    Rating:
    98%
    $26.50 / Units
  6. small Stainless Steel Sprouter

    small Stainless Steel Sprouter

    Rating:
    100%
    $22.00 / Units
  7. Master Microgreens Kit

    Master Microgreens Kit

    $96.69 / Units
Write Your Own Review
Only registered users can write reviews. Please Sign in or create an account
© 2021 Sproutpeople