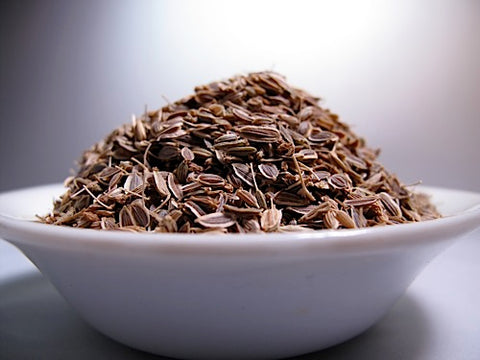
Dill Sprouts
Used for years as a key ingredient in some of our Leafy Sprout Mixes, Dill is now available straight, so you too can enjoy its flavor and unique characteristics
This seed can also be used - and is the same seed we sell for growing Dill Micro-Greens.
We sell Dill by the 1/4 pound
Vitamins A, B, C
Calcium, Iron, Magnesium, Phosphorus, Potassium, Zinc
Chlorophyll, Digestive Aid, Trace Elements, Amino Acids
Protein: 5%
Tastes like a spicy pickle!
The amount of Dill Sprouts produced by 1 unit of Seed. For Example 2:1 means that 1 pound of Seed will produce 2 pounds of Sprouts or whatever crop you are growing. You do not have to grow them all at once of course, unless you wish to =:-D
The time it takes to grow a finished 14 - 16 days, or other crop (Micro-Greens, Grass, Greens) from a dry Seed. Note: This "finished" Sprout is our preference. you may grow them for as long as you want! In fact, we suggest that you taste them at every rinse to discover when you like them best.
How to Grow Dill Sprouts
- Put 1/4 cup of Dill in your Sprouter. Dill does not Soak.
- Rinse thoroughly.
- Drain thoroughly.
- Rinse and Drain with cool water once every 24 hours, for 5 days.
- At this point - Rinse and Drain once every 48 hours.
- Your sprouts will be done about 14-16 days after you started.
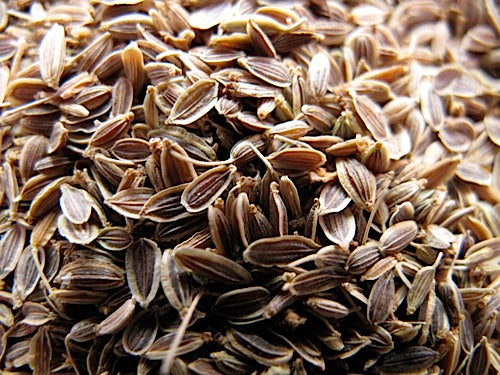
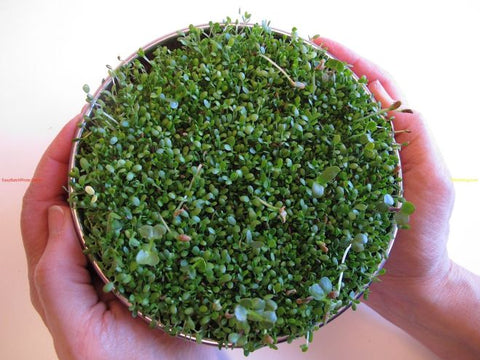
Your Dill is going to look like this for quite a while.
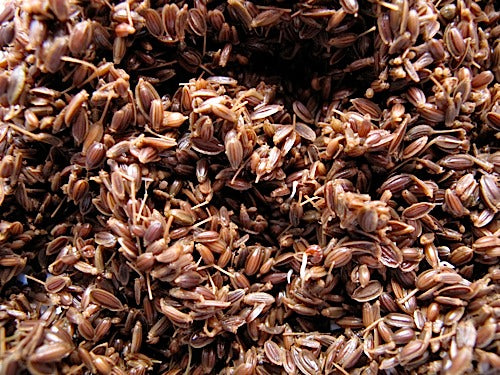
Your Dill will show some signs of germination in about 2 weeks - assuming you are following our instructions - just over there, on the right -->
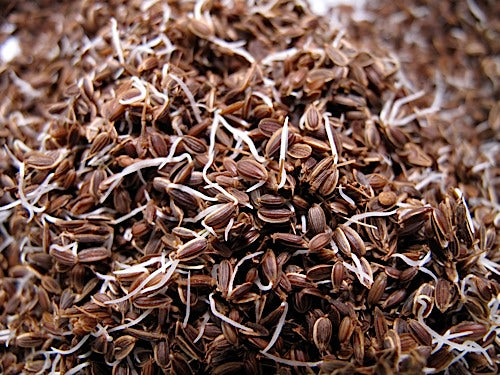
Once Dill germinates, it will grow faster - well - faster than it has up 'til now....
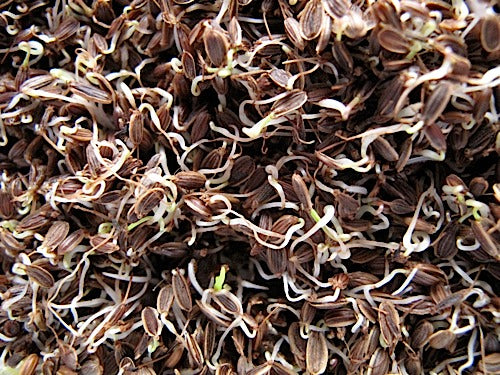
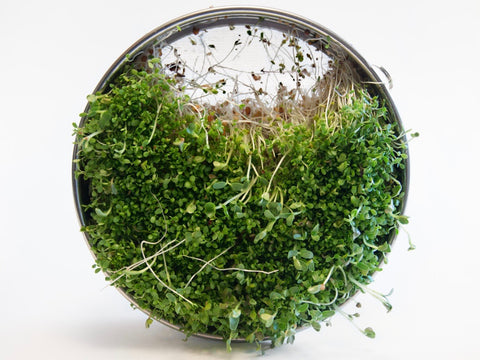
This is what we see around day 17-19.
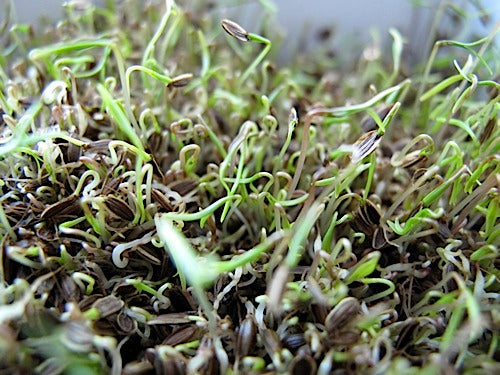
Hope to see this at about 21 days.

Your Dill is going to look like this for quite a while.

Your Dill will show some signs of germination in about 2 weeks - assuming you are following our instructions - just over there, on the right -->

Once Dill germinates, it will grow faster - well - faster than it has up 'til now....

This is what we see around day 17-19.

Hope to see this at about 21 days.
Things you need to know before sprouting Dill: We are not experts in regards to Dill. We are still experimenting with it once in a while, so our instructions may change in time, though these instructions do work well. Dill is the exception to many "rules" of sprouting. Enjoy the experience!
Yields approximately 1 Cup (1/2 lb.) of Sprouts
Seed Prep Measure out 1/4 Cup of seed* Rinse your seeds to remove dust or plant debris.
Do NOT Soak Dill.
Sprouting Put the seeds into your Sprouter.
Rinse thoroughly with cool (60-70°) water. Drain thoroughly.
Always be sure to Drain very thoroughly. The most common cause of inferior sprouts is inadequate drainage. Even the best designed Sprouting Device holds water, so pay special attention to this step.
Set your Sprouter anywhere out of direct sunlight and at room temperature (70° is optimal) between Rinses. This is where your sprouts do their growing. We use a counter top - in the corner of our kitchen, but where the sprouter won't get knocked over by cats, dogs, kids or us. We don't mind the indirect sunlight or the 150 watts of incandescent light, because light just does not matter much. These Sprouts will never have leaves, and a plant can only perform photosynthesis when it has leaves. Until then light has little if any effect, so don't hide your sprouts. Plus, they like air-circulation. This will be more than enough light to when the time comes.
Rinse and Drain again in 24 hours. Yup, once a day! Rinse and Drain every 24 hours for 5 days. After that it gets even weirder.... Rinse and Drain every 48 hours from here on. You should start seeing roots by the 2nd of these every-other-day cycles (it takes 7-8 days, in our experience).
Greening On, approximately the 12th day - relocate your sprouts if necessary. If you've been keeping them away from light for some reason, move them. Avoid direct sun - it can cook your sprouts, if you are using an enclosed Sprouter. Indirect sunlight is best but virtually any light will do. Experiment - you will be amazed at how little light sprouts require to green up. Photosynthesis is a marvel!
Remember: Continue to Rinse and Drain every 48 hours. As long as you grow you have to keep the sprouts happy.
Finishing Your sprouts will be done between days 14-16. The majority of sprouts will have open leaves which will be green if you exposed them to light.
As always, we suggest that you taste your crop at EVERY Rinse - including the very first - just after the Soak period. The soaked seeds are already alive and super nutritious - and - they are without enzyme inhibitors (a very good thing indeed!) so they'll digest themselves and nourish you. So taste them often and find out for yourself when they are most delicious! That's when they're done. This is especially true with Dill. Its flavor changes dramatically over time. We find it very spicy early on. It becomes very dilly near the end.
Harvest Your sprouts are done 8-12 hours after your final Rinse. Be sure to Drain them as thoroughly as possible after that final Rinse. The goal during the final 8-12 hours is to minimize the surface moisture of your sprouts - they will store best in your refrigerator if they are dry to the touch.
Refrigerate Transfer your sprout crop to a plastic bag or the sealed container of your choice and put them in your refrigerator. We offer Produce Storage Bags that will extend shelf life substantially. Note: Dill can last in refrigeration for up to 2 weeks, but they are very fine sprouts. If you can use 'em fresher we think you'll like them better.
*Seed to Use
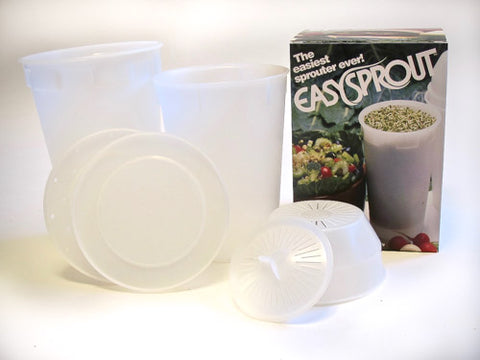
*You can sprout smaller amounts - which in this case is a good idea. Dill is an fairly expensive seed which produces an uncommon sprout - a sprout most have never had. We think it a good idea to try a small amount before committing a lot of seed. We run our tests with 1 Tablespoon, in an Easy Sprout Sprouter.
These seeds will yield approximately 4:1 (you get 4 pounds for every pound of dry seed), so in theory you can start with 1/4 as much dry seed as your Sprouter has capacity. We generally advise maxing out at 1/2 capacity, until you get used to growing a particular crop.
Dill is one of our more esoteric offerings. We've used it in mixes since our early days, but we never sold it straight until 2010. Enough people have asked that we decided to offer it to you. It is an unusual sprout - most have never seen it, let alone tasted it. Dill takes about 15 days to sprout. It is a very unusual seed to sprout as it breaks many of the supposed rules of sprouting. It is very flavorful!
Sprouting
I hesitate to add this, as I am concerned it will just confuse you, but I'm so into full disclosure that I opted to include this: Light may help Dill germinate. The problem with using bright light is that it dries out your seeds/sprouts. Since Dill uses so little water during sprouting, it is possible that it would get too dry to sprout. Frankly, I just don't know - yet. I've been too busy with all our regular sprout work to sprout Dill of lately - So, until I can replace this text with authoritative text, you'll have to experiment on your own. It's not like you have to. Our instructions work well, but if you like to experiment, you may find you can get the Dill sprouting sooner. When I get to experimenting again, I'll even be trying direct sunlight. In nature Dill often grows wild. My guess is that some Dill farmers even let it re-seed itself - as opposed to planting new seed manually every year. All plants grow seeds. If left unharvested those seeds will fall to the ground. Most seeds work their way into the soil with the help of the freezing and thawing which causes the ground to heave and retract through the fall, winter and early spring. In the case of Dill, the seeds are so exceptionally light, that they will mostly stay atop the ground over winter. Dill grows so prolifically that it is my conclusion, that light may help them germinate. Maybe I'm wrong. I'll tell you as soon as I know. I love learning about seeds - and just about anything else for that matter.
My First Time
I tried sprouting Dill straight, back in 1993 or 94. I soaked it - then rinsed it twice a day for 2 weeks. Nothing. Back in those days we grew all of our sprouts outside - near our well. It was a partially shaded area, but it had direct sunlight for a good part of the day. I got fed up with the Dill, so I put it aside. Normally I cleaned up after every crop, but the Dill was sitting in small tray (we grew everything in standard nursery trays back then), so I just shoved it to a little used spot. I left the tray uncovered and untended for another week or two (I forget). At some point I noticed the tray. It was full of sprouts! It had gone at least a full week without water, and had been sitting in a bright spot. The wind didn't dry it to death, the sun didn't either. It sprouted! We found its flavor to be hot. Since we didn't like it, we didn't grow it straight again for 15 years. We have found that its flavor will change to the dill-weed-flavor we want. Our instructions are derived from the method that produced the flavor we wanted. They were also inspired by that ancient forgotten crop. Once again, a lesson was learned from failure.
Micro-Greens Note:
You can also grow Dill as a Micro-Green. To do so, follow the instructions on our Celery Greens page.

