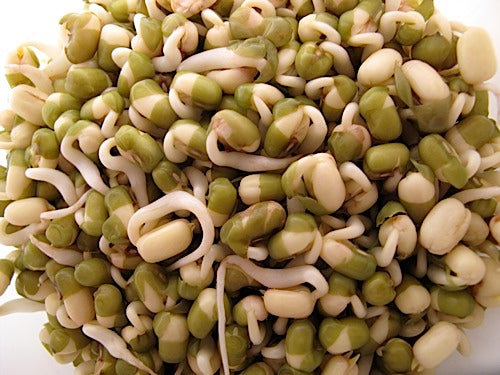
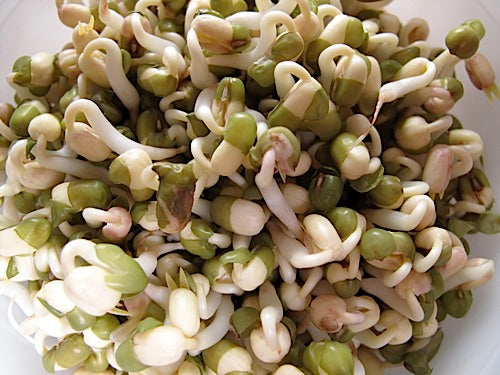
Mung Bean Sprouts
The most widely consumed sprout on our planet! Absolutely unique, Mung Bean Sprouts are fun to grow and lend themselves to many great Recipes. great, grEAT, GREAT!
Vitamins A, B, C and E
Calcium, Iron, Magnesium, Potassium
Amino Acids
Super bean sprout, so fresh and crunchy-sweet.
The amount of Mung Bean Sprouts produced by 1 unit of Seed. For Example 2:1 means that 1 pound of Seed will produce 2 pounds of Sprouts or whatever crop you are growing. You do not have to grow them all at once of course, unless you wish to =:-D
The time it takes to grow a finished 2 - 5 days, or other crop (Micro-Greens, Grass, Greens) from a dry Seed. Note: This "finished" Sprout is our preference. you may grow them for as long as you want! In fact, we suggest that you taste them at every rinse to discover when you like them best.
How to Grow Mung Bean Sprouts
- Soak 1/3 to 1 cup of beans in cool water for 8-12 hours.
- Drain off soak water.
- Rinse thoroughly.
- Drain thoroughly.
- Rinse and Drain with cool water every 8-12 hours.
- Bean Sprouts don't need light. Keep your Sprouter in a low light location.
- Harvest on day 2 or 3, when most of the beans have short roots. Refrigerate your crop.
- Mung Beans can be grown bigger. See our Detailed Instructions to learn how
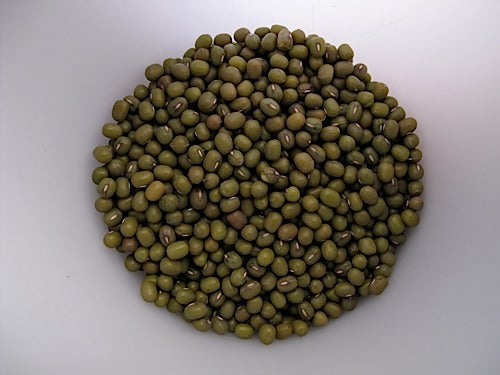
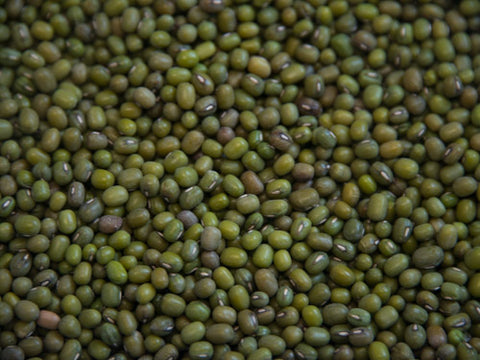
Dry Mungs await their Soak.
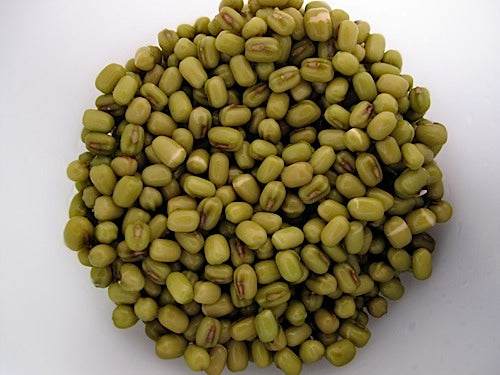
12 hours later... Soaked, Rinsed and Drained.
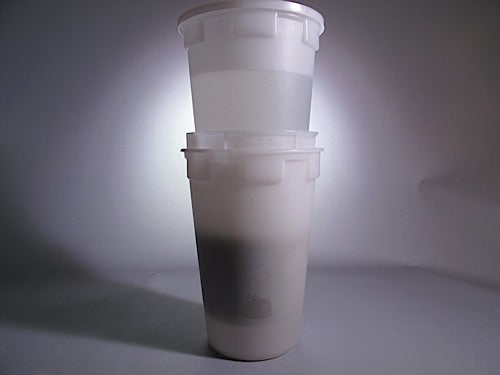
Here is the weight we use when growing in Easy Sprout. The top is a water filled Solid Base with a Solid Lid. That is sitting directly on our Mung Beans in the lower Easy Sprout's Growing Vessel - which is of course sitting in its elevated position within another Solid Base.
12 hours later... another Rinse/Drain cycle.
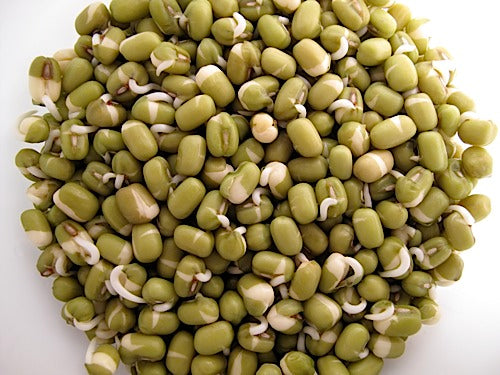
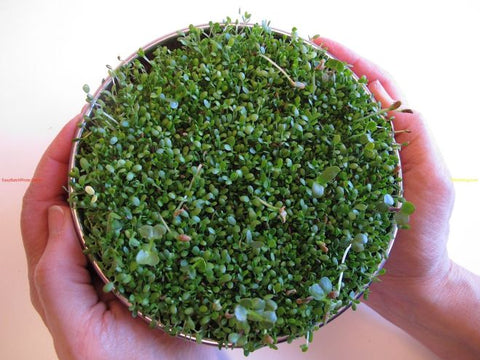
12 hours later... another Rinse/Drain cycle. You can be done now. They're small but perfect.

Here is what they look like if you harvest now (the same time as the picture above). If you are going for big thick roots, keep on sproutin'!
12 hours later... another Rinse/Drain cycle.
12 hours later... another Rinse/Drain cycle.
12 hours later... another Rinse/Drain cycle.
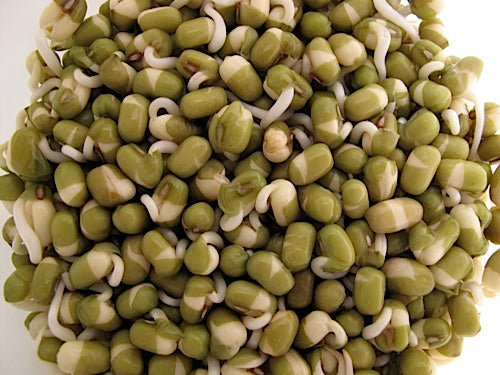
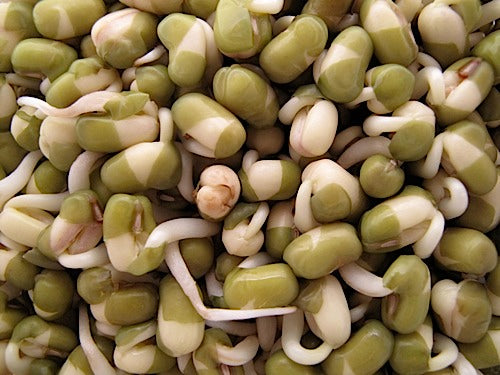
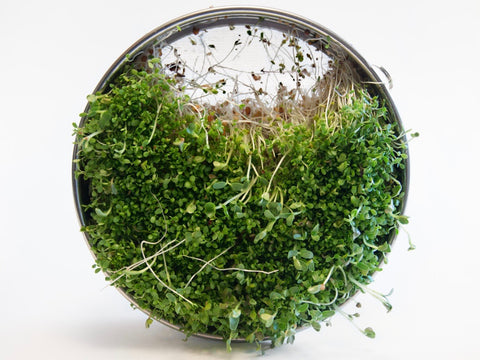
12 hours later... Harvest Time! Once you manage to get the sprouts out, they will look something like these.
Dry Mungs await their Soak.
12 hours later... Soaked, Rinsed and Drained.
Here is the weight we use when growing in Easy Sprout. The top is a water filled Solid Base with a Solid Lid. That is sitting directly on our Mung Beans in the lower Easy Sprout's Growing Vessel - which is of course sitting in its elevated position within another Solid Base.
12 hours later... another Rinse/Drain cycle.
12 hours later... another Rinse/Drain cycle. You can be done now. They're small but perfect.
Here is what they look like if you harvest now (the same time as the picture above). If you are going for big thick roots, keep on sproutin'!
12 hours later... another Rinse/Drain cycle.
12 hours later... another Rinse/Drain cycle.
12 hours later... another Rinse/Drain cycle.
12 hours later... Harvest Time! Once you manage to get the sprouts out, they will look something like these.
Yields approximately 1 1/2 Cups (1/2 lb.) of Sprouts
Put 1/3 - 1/2 Cup of seed* into a bowl or Sprouter.
Most Mung Beans are grown in China by farmers - often with little machinery. After harvest they are left to dry on gravel roads - so they are dusty. 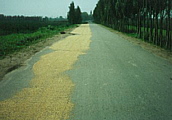 So: Prep your Mung Beans before Soaking, by running water through them until the exiting water runs clear.
It doesn't take long - they aren't very dirty nowadays. Is that not cool?! The dust/dirt you just washed off of your Mungs was part of a Chinese road!!!
So: Prep your Mung Beans before Soaking, by running water through them until the exiting water runs clear.
It doesn't take long - they aren't very dirty nowadays. Is that not cool?! The dust/dirt you just washed off of your Mungs was part of a Chinese road!!!
Add 2-3 times as much cool (70°) water. Mix seeds up to assure even water contact for all. Allow seeds to Soak for 8-12 hours.
Empty the seeds into your Sprouter, if necessary. Drain off the soak water. You may use it to water plants - or use it in stock if you like - it has nutrients in it. Rinse thoroughly with cool (60-70°) water. Drain thoroughly.
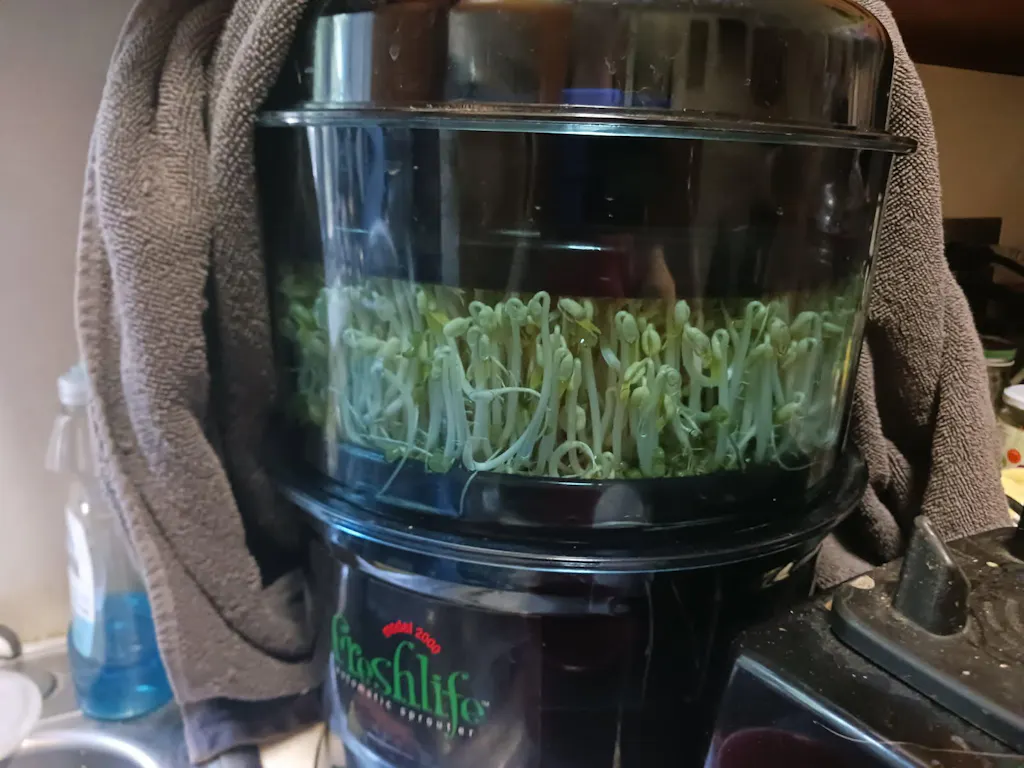
Set your Sprouter anywhere out of direct sunlight and at room temperature (70° is optimal) between Rinses. This is where your sprouts do their growing. We use a counter top - in the corner of our kitchen, but where the sprouter won't get knocked over by cats, dogs, kids or us. We don't mind the indirect sunlight or the 150 watts of incandescent light, because light just does not matter much. A plant can only perform photosynthesis when it has leaves. Until then light has little if any effect, so don't hide your sprouts. They like air-circulation.
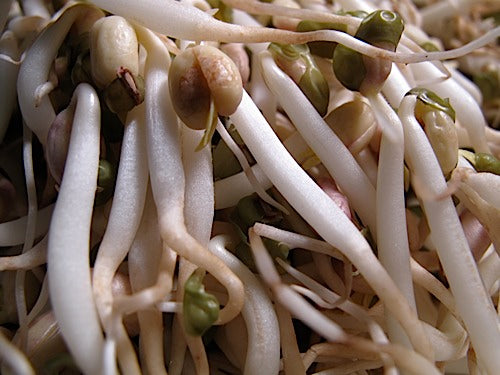
How Long to Grow If you want to grow Short Sweet Mungs - with 1/8 - 1/2 inch roots: Rinse and Drain every 8-12 hours. for 2 - 3 days.
If you want to grow Big Thick Rooted Mungs - with 1 - 3 inch roots: Rinse and Drain every 8-12 hours. for 4 - 6 days.
Grow them for as long as you like and find out for yourself when they are most delicious! Taste a few at every Rinse/Drain. All you have to do is Rinse and Drain every 8-12 hours.
Big and Thick Notes:
Mung Bean Sprouts are most commonly seen big and thick rooted. They are very common in Chinese and other Asian cuisines. Most commercial Mung Beans are grown with chemicals and gasses in huge 500 gallon machines. You will likely never get your home grown sprouts to look like those you see at a restaurant or supermarket, but you can get some thick roots. To do this you will need a Sprouter which drains from the bottom (Easy Sprout is the perfect choice), and you'll need to add these procedures to your growing schedule:
•When you Rinse, do not disturb the seeds/sprouts. The beans need to stay where they are - to form a mass that is unmovable. Rinse longer - with lower water pressure (if your sink has a sprayer, use that) during the first 2-3 days - until they are firmly in place.
•Keep your sprouter in as dark a place as you can without limiting air flow too much: Don't put them (or any other sprout) in a closed cabinet or closet, etc. Darkness is a VERY over-rated element in sprouting! Just minimize it by using a darkish corner in your kitchen.
•Apply a weight directly to the beans while in the sprouter (between Rinses. We recommend using two Easy Sprouts. We fill the Solid Base (of the Easy Sprout that we aren't growing in) full of water - and snap the Flat Solid Lid onto it. We then put that Solid Base right on top of the beans between Rinses. You can rig something else if you like - using Easy Sprout or another sprouter.
•On the 3rd day, or when your beans are solidly in place (they won't be budged by water), soak the sprouts for 10-20 minutes in cool water. If you are using Easy Sprout all you have to do is leave the Growing Vessel in the Solid Base (that in which it always sits between rinses) and fill it up.Rinse well after this soaking.
•As the sprouts grow you can reduce the weight on them to nothing by the last day. The sprouts themselves form such a tight mass that they apply their own weight.
•You may skip the last Rinse - allowing your sprouts to grow for 24 hours without water. They will generate more heat (which all sprouts do as they grow - at every stage) than usual and can gain substantial mass during this period. There is a slight danger in this - that the sprouts will generate too much heat and will start to slow-cook, but it is a very rare problem. Do it when your house is cool, but skip it during hot weather.
Experiment! Have Fun! It's All Good!
Harvest Your sprouts are done 8-12 (or 24) hours after your final Rinse. Be sure to Drain them as thoroughly as possible after that final Rinse. The goal during the final 8-12 hours is to minimize the surface moisture of your sprouts - they will store best in your refrigerator if they are dry to the touch.
Refrigerate Transfer your sprout crop to a plastic bag or the sealed container of your choice and put them in your refrigerator. We offer Produce Storage Bags that will extend shelf life substantially.
* If using Sproutpeople's Single Harvest Pack use the whole bag in a one-quart Sprouter.
We suggest you not exceed 1/2 cup of seeds per quart of sprouter you have, until you are experienced with Mung Beans, but you can THEORETICALLY grow more: The yield will be approximately 2:1 if you are growing Short & Sweet Mungs, so you can theoretically start with as much as 1/2 as much dry seed as your Sprouter has capacity. This is likely to result in too many sprouts, but we're talking theory here. If you are going for Big & Thick Mungs, yield may be as high as 3.5:1. Maxing out your Sprouter creates so much mass that it can help your sprouts grow Big and Thick. You can start with dry seed equal to 1/4 of your Sprouter's capacity, but be aware that they may outgrow your Sprouter if you exceed our yield estimate. Don't blame us if you grow so well that some of your sprouts escape @;-)
The most consumed sprout on Earth, Mung Bean are grown primarily in China and are used extensively in Asian cuisine. Perhaps the most exciting sprout to grow, Mung Beans offer fun and unique challenges - if you grow them with big, thick roots.
Mung Bean Sprouts are possibly the best of all sprouts when it comes to cooking - especially if you like Chinese food. Some of our finest recipes call for Mung Bean Sprouts.
Mung Beans will pale as they swell with water. Before you end your soak, check them: If you see that on a lot of your beans, part of the bean (one end usually) is still as dark as it was before soaking, they may need a little more time to soak - to make sure they have taken up all the water they need. This is difficult to explain, but I will of course try. If that dark green is no more than 20% of the seed, consider it fully soaked. The seeds continue to take up water even after soaking, so they'll be fine. If more of the seed than 20% is still dark green, drain the soak water and add fresh water. Soak for a few hours more and check them. You'll be done soaking when the seeds are at least 80% pale. Of course, if you got your seed from us, we will tell you here if you need to soak them for more than 12 hours. We haven't had a lot of Mungs that required such special treatment since the last millenium, so don't sweat it - if you are using Sproutpeople Mung Beans.
In any case, we soak Mung Beans for 12 hours. If we are in a hurry we'll use warmer water - 80-90° is a good starting point if you want to experiment with shorter soak periods, but be careful not to go too hot - that can cook your seeds in which case they will never sprout.
Hard Seeds
Mung Beans also tend to have hard seeds once in awhile. If you buy your seed from us this is not much of a concern, but these are beans after all, so it is always good to check for hard seeds - as well as rocks (hey, these grow on farms! Dirt Happens!). If you buy Mung Beans or other seeds elsewhere be sure to examine them after soaking to make sure there are no hard seeds (seeds that are as hard after soaking as before) . If there are - throw those (the hard ones) out (or better yet, compost them)! Hard Seeds are easy to spot as they are smaller than those that are swollen with water, as we detailed above.
Big and Thick Mung Beans - Growing With Gas
We are still working on this, so the details will not be here until we have firm conclusions. When we do, they will replace this text: Our tests to date seem to validate the theory...... Here's the theory. It runs counter to our rap on Air Circulation, but hey, there are always exceptions to any rule, right? Fruit off-gasses as it ripens. The gas is ethylene. Ethylene is a gas used in commercial Mung Bean production. Ethylene gas seems to promote the root growth of Mung Beans. We use a large paper bag - from a grocery store. Allowing space for the Sprouter, we put in the bag; bananas and apples. We use organic fruit. We will be experimenting with other fruits to determine which work best. Here are fruits that emit ethylene gas: Apples, Apricots, Avocados, Bananas, Cantaloupe, Honeydew, Kiwi fruit, Mangos, Nectarines, Papayas, Peaches, Pears, Plums, Tomatoes. We don't know yet whether there are more, nor which produce the most gas. We work on this as time allows. Here is the rest of what you need to know if you want to experiment yourself: We use the exact same technique we detail in our Sprouting Instructions (above), though we are still trying to determine if applying weight to the growing sprouts is necessary. We are trying to grow in an Easy Sprout with a second Easy Sprout, partially filled with water as a weight. Our alternative method is to grow in a standard Easy Sprout with no weight applied to the seeds/sprouts. Isn't education grand?:~) Ironically we sell a product which helps keep sprouts and other vegetables and fruits fresh longer. Our Produce Storage Bags do so by allowing the ethylene gas to escape the bag. Perhaps we should try using them in our tests. Hmmm.
De-Hulling Mung Bean Sprouts
We do not try to remove the hulls of Mung Bean sprouts. They are thin, inoffensive, have no noticeable affect on shelf life, and they add color. The hulls are very difficult to remove, so we advise leaving them in your crop. We've eaten these hulls for 2 decades. They're swell. For those who want to know why store bought mungs often have no hulls - the answer is that commercial growers have big de-hulling machines that agitate the sprouts as they pass through a trough filled with moving water. It's a very elaborate process with no home version - at least not one we've figured out to date. As we like the hulls, we probably never will find a home solution, so enjoy your crop - hulls and all. Happy Sprouting!
Recommended Sprouters for Mung Bean Sprouts

love these mung bean sprouts—they are my favorite
My favorite!
haven't tried them yet but know they'll be great
Easy to sprout, instructions, more quell, fairly quick to get to eating stage.
The day I received the order, I soaked some of the beans overnight, then put them in my Tribest sprouter and covered them up with a towel. The next evening when I went to change the water, the sprouts were several inches high already! And there was 100% germination. We harvested and ate the sprouts the next day, and they were delicious.