Hemp Felt Growing Medium - Bulk
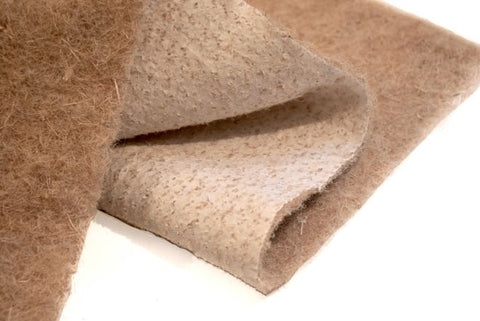
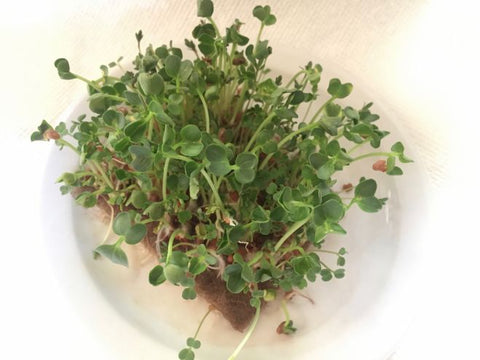
Hemp Felt is a thin (3/16 inch) medium which holds water well and is easy to handle. Our bulk Hemp Felt is made from Hemp fibers, which are pressed - to form a sheet. Our new Hemp Felt has a thin, dissolving cellulose backing for added strength. Use as is and it will simply melt away as your crops grow. Or, if you prefer very gently peel the cellulose backing from the hemp. But no need; this new hemp felt is completely compostable! (Pictured in little test squares; our Sproutpeople sizes vary).
1 Bulk Unit = 1 foot x 3 feet
We also offer pre-cut Hemp Felt.
This page is where you purchase Bulk Hemp Felt
Yields approximately 4 Cups (1/2 lb.) of Sprouts
Seed Prep
Measure out 2 Tablespoons of seed* (slightly heaping) into your Sprouter or a strainer.
Rinse your seeds to remove dust and debris.
Soak
Transfer your seeds into your Sprouter (if necessary), or to a bowl.
Mix seeds up as you slowly add water to assure even water contact for all.
Add 2-3 times as much cool (70-80°F) water.
Allow seeds to Soak for 4-12 hours.
Do Not Ever Soak Again. Soaking is done only this one time.
We start counting days at this point - when the Soak is done (post-Soak is the phrase we use).
A crop of Leafy Sprouts usually takes 6 days - from This point in time to harvest.
Sprouting
Empty the seeds into your Sprouter (if necessary).
Drain off the soak water.
You can use it - it has nutrients in it. We use it on house plants.
Rinse thoroughly with cool (70-80°F) water.
Drain thoroughly.
Draining Thoroughly (Maniacally even) is the key to great crops. The smaller the seed (all Leafy Sprouts are small seeds) the more thorough you must be. Do Not skimp on Rinsing - but focus seriously on Draining.
If you need to see what we mean by Thorough Draining - check out our videos.
Set your Sprouter anywhere out of direct sunlight and at room temperature (70° is optimal) between Rinses.
This is where your sprouts do their growing. We use a counter top - in the corner of our kitchen, where the sprouter won't get knocked over by cats, dogs, kids or us. Indirect sunlight is fine, as is your regular room light - because light just does not matter much in the first couple days.
A plant can only perform photosynthesis when it has leaves. Until a plant has leaves, light has little if any effect. Sprouts also happen to like air-circulation, so don't hide your sprouts. When leaves do appear, this will be plenty of light for them to green up. You can also use Grow Lights if you like.
Rinse and Drain again every 8-12 hours for 3 days.
Always be sure to Drain very thoroughly. The most common cause of inferior sprouts is inadequate drainage. Even the best designed Sprouting Device holds water, so pay special attention to this step.
Greening
On the 4th day (post soak) relocate your sprouts, if necessary.
If you've been keeping them away from light - move them. Avoid direct sun as it can cook your sprouts, unless you are growing in a Tray Sprouter - in which case direct sunlight is great. Indirect sunlight is best for non-tray Sprouters but grow lights work well too. Experiment - you will be amazed at how little light sprouts require to green up. Photosynthesis is a marvel!
Continue to Rinse and Drain thoroughly every 8-12 hours.
Your last Rinse and Drain will be either at the end of day 5 or the start of day 6.
Always Drain Thoroughly.
Finishing
Your sprouts will be done about the end of day 6.
The majority of sprouts will have open leaves which will be green. You'll recognize them.
De-Hulling
Hulls are the thin coat on a seed. In most cases they separate themselves from the sprout. They are only a problem when it comes to the shelf life of your finished crop. We've eaten them for years and consider them extra roughage, but the crop looks better and lasts longer without them - so removing them is good.
You may De-Hull your sprouts at any time during day 5 or 6.
If you have a Salad Spinner - De-Hulling can be your last step. You can harvest and refrigerate them immediately after you finish.
You can also remove hulls prior to harvest...
If you are growing in a Jar - using the Coarse Mesh Screen will allow some hulls to float out through the screen while Rinsing. Repeating and agitating your sprouts will allow more hulls to escape.
If you're growing in an Easy Sprout Sprouter - transfer your sprouts to the Solid Base, fill with water, and agitate with a fork. This will help hulls get to the surface - where you can skim them off. When you've gotten all you can - move your sprouts back to the Growing Vessel, Rinse again, and Drain Thoroughly.
If you're growing in our Stainless Steel Sprouter you can get rid of most of the hulls by Rinsing Upside Down. Instead of writing words - let us direct you to our short video on the subject: Rinsing Leafy Sprouts Upside Down
Here is our video on De-Hulling.
Harvest
If you De-hulled with a salad spinner - you can go right to refrigeration. If not... Your sprouts are done 8-12 hours after your final Rinse and Very Thorough Draining. If we minimize the surface moisture of our sprouts they store much better in refrigeration, so we let them sit for 8-12 hours after that final Maniacal Draining.
Storing Your Crop
Transfer your sprout crop to a plastic bag or the sealed container of your choice. We have Produce Storage Bags that can extend shelf life substantially.
Leafy Sprouts are best within a week of harvest, but we've had some crops last for over a month in the fridge.
Great work sprout farmer!
*Amount of Seed to Use
* If using Sproutpeople's Single Harvest Pack - use the whole bag (for a one-quart Sprouter). It will produce a crop of approximately 8 ounces.
These seeds yield approximately 7:1 - which means the sprouts will weigh 7 times as much as the seed you start with, but, they will increase even more in volume - so don't start with more than 2 (heaping) Tablespoons per quart/litre of sprouter capacity.
Hemp Felt is a thin (3/16 inch) pad that holds water very well and which is easy to handle, which makes it an excellent growing medium. Combined with Kelp fertilizer you can grow Micro-Greens without the mess of soil. Hemp Felt is also a wonderful way to grow Grass and Microgreens - though you should consider Coconut Coir for the bigger seeds.
Our Hemp Felt is organic, biodegradable and cuts easily to size to fit any container or tray. Buying it by the Linear Foot is the best deal, of course, though we do offer pre-cut sizes as well.
This is a disposable (compostable) medium. Don't try to use it again - just cut another piece or use a new pad for your next crop.
FOR USE WITH THESE SEEDS/CROPS
Micro-Greens
Grass
and any other small seed you want to grow into a tiny plant.
Do not try to re-use Hemp Felt. Just compost your used pad and start fresh with your next crop.
Thorough Instructions are given on the detailed pages we have for every seed/mix we sell.
Buy this in bulk and save money. Cut it to fit whatever containers you have, soak it in water and liquid kelp ... and grow your own micro-greens! Also excellent for kitty grass. My cats LOVE the grass seed SproutPeople sell.
We had picked up a fancy shmancy water fountain for our kitties in which there is a section to place seeds to grow some cat grass. It only came with one batch of seeds to grow, so that is when I found Sprout People. :-)
Anyhow, they said to just sow the seeds into the area, no medium whatsoever.... yeah, it worked, but the cats had the grass, roots and all, dragged out of it before it could even grow much at all..
Enter Baby Blanket! I cut a piece to fit the growing area on the fountain, and positioned it in it.. then sowed the seeds (The wonderful Cat Grass mix ones I got from here.) ... PERFECT! The grass was growing within 24 hours, the kitties could nibble at the new growth without pulling them out completely. Our kitties loves their grasses. (And my other houseplants are saved!)
Since it is a small area for planting (I use about 2TBSP of Cat Grass seed mix per planting), they do go through it quickly in spite of me having one or two more pots with the grass in it around the house. I definitely must keep some of this on had to cut a fresh piece with each new round we will do.