Kohlrabi Sprouts - Purple Kohlrabi
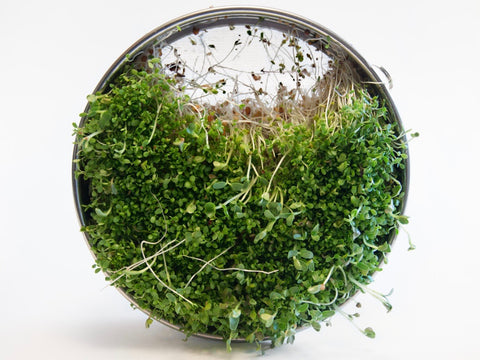
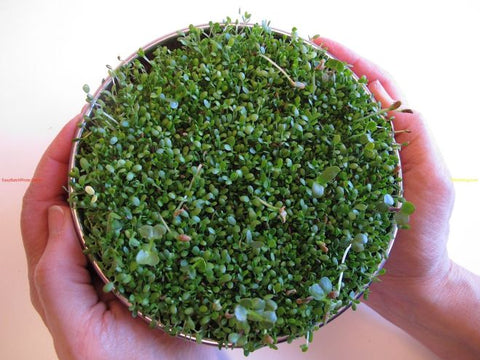
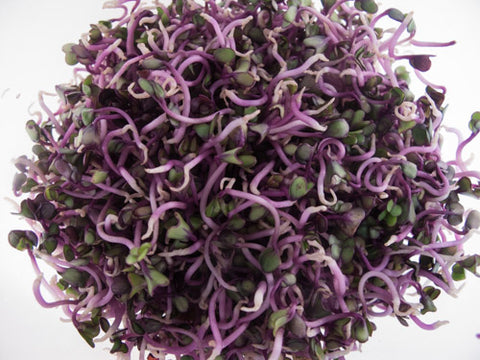
Mild, sweet, flavor similar to other Brassicas. This Kohlrabi produces a lovely deep purple sprout with green leaves which include a purple fringe.
Note: This is the same seed we sell for Kohlrabi Micro-Greens.
Note: We sell Purple Kohlrabi by the 1/2 pound.
Vitamins A, B, C, E and K
Calcium, Iron, Magnesium, Phosphorus, Potassium, Zinc
Carotene, Chlorophyll, Amino Acids, Trace Elements
Antioxidants
Protein: 30-35%
Mild, sweet, cabbagey, and nutty
The amount of Kohlrabi Sprouts - Purple Kohlrabi produced by 1 unit of Seed. For Example 2:1 means that 1 pound of Seed will produce 2 pounds of Sprouts or whatever crop you are growing. You do not have to grow them all at once of course, unless you wish to =:-D
The time it takes to grow a finished 5 - 7 days, or other crop (Micro-Greens, Grass, Greens) from a dry Seed. Note: This "finished" Sprout is our preference. you may grow them for as long as you want! In fact, we suggest that you taste them at every rinse to discover when you like them best.
How to Grow Kohlrabi Sprouts - Purple Kohlrabi
- Soak 3 Tbs. of seed in cool water for 4-12 hours.
- Drain off soak water. Do not ever soak again.
- Rinse thoroughly.
- Drain Thoroughly.
- Rinse and Drain with cool water every 8-12 hours.
- On day 3, move your Sprouter to indirect sunlight.
- Continue to Rinse and Drain every 8-12 hours.
- Harvest on day 5 or 6, when the leaves are open and most of them are green.
- De-Hull your crop if you like, before Refrigerating.
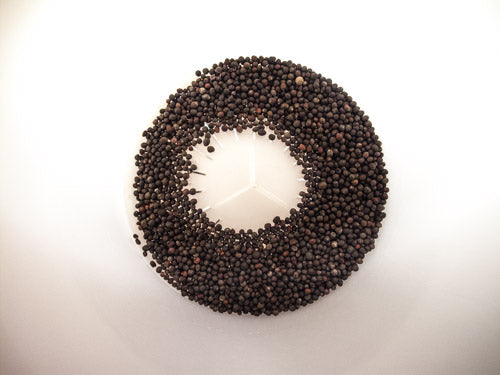
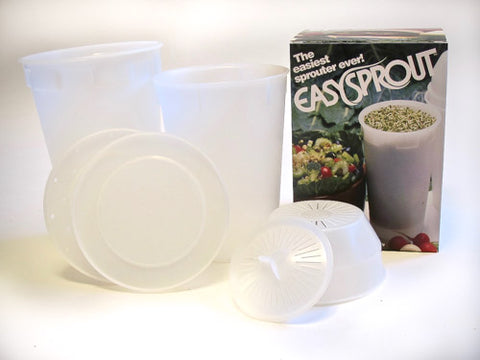
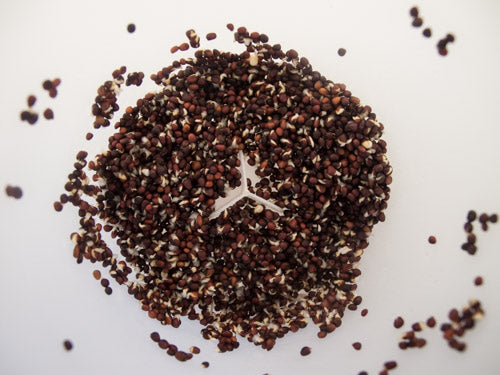
The seed of most Brassicas is virtually identical, but this one is Purple Kohlrabi seed. It is awaiting its Soak in an Easy Sprout Sprouter. I only had 1 Tablespoon of seed when I started - as opposed to the 3 Tbs. I would have normally soaked. That's why you can see the Small Seed Insert, which we snap into the bottom of the Easy Sprout when sprouting - - you guessed it - - small seeds..
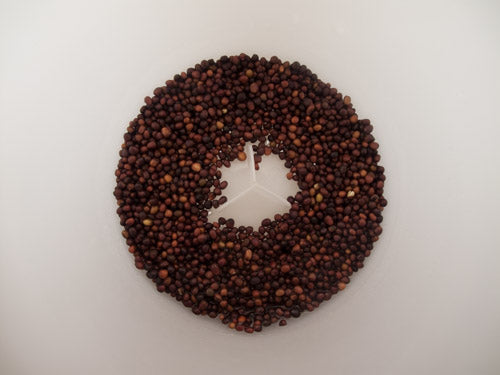
After an 8 hour Soak, followed by their first Rinse and thorough Draining.
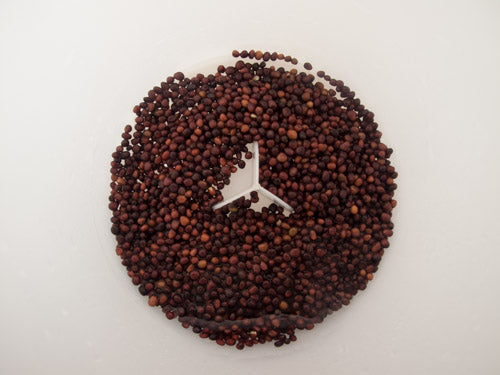
12 hours later, following another Rinse and thorough Draining.
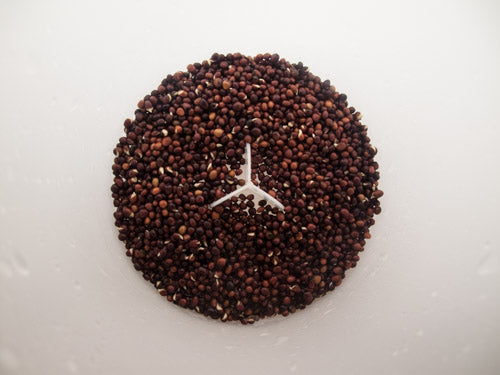
Another 12 hours later, following another Rinse and thorough Draining.
Yet another 12 hours passes....
I think you get the idea - every 12 hours you Rinse and Drain thoroughly.
Be sure to click the Video tab, and watch our scintillating bit of cinema that lives there. It's on growing Broccoli Sprouts, but the process is Identical.
It'll really help you grasp fully what I mean by Thorough.
If you are sprouting in a hot and humid place/time, add a 3rd Rinse/Drain to your daily schedule (8 hours apart of course) - from the time you start and until your crop is done. Sprouts generate a lot of heat as they grow, and Brassicas are cool weather crops, so they very much appreciate being cooled down.
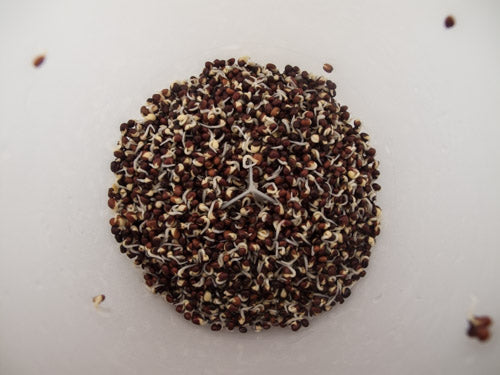
12 hours later.
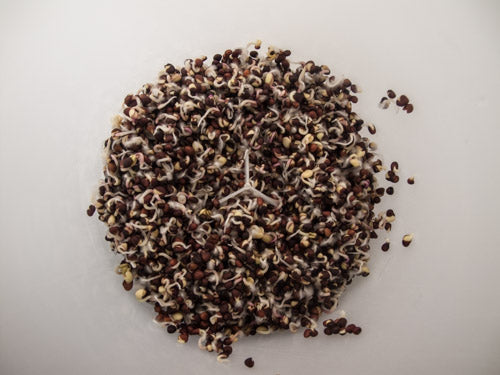
12 more hours later.
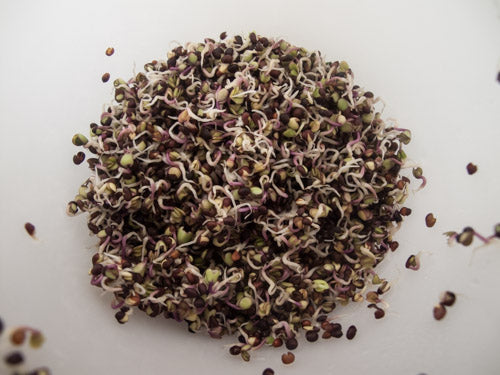
And - another 12 hours passes.
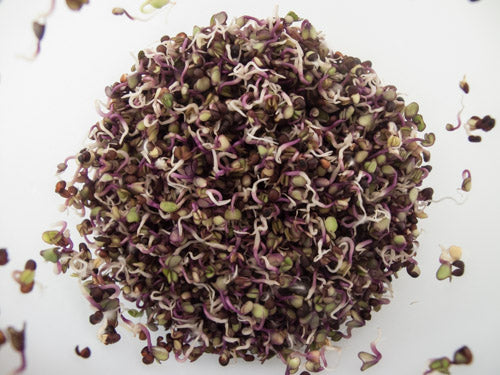
12 hours later I like to partially De-Hull my crop. I say partially, because there will most likely be enough hulls left when harvest time comes, that a thorough De-Hulling will be desirable.
To do thi partial de-hullings, fill your Easy Sprout (you can also do this if you're sprouting in a Jar, but if you're using a Tray Sprouter, skip this step) with water and stir your sprouts up, so hulls can float to the surface where you can skim them off.
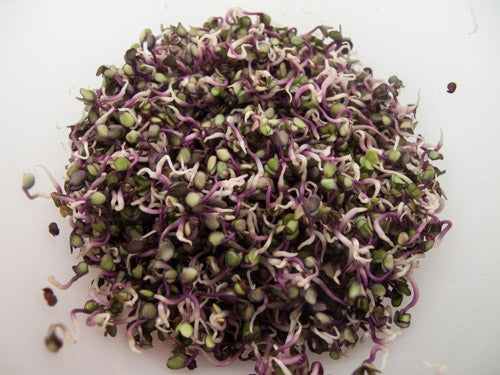
12 hours later.
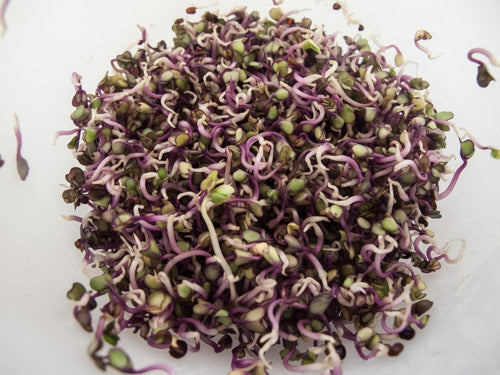
12 hours later.
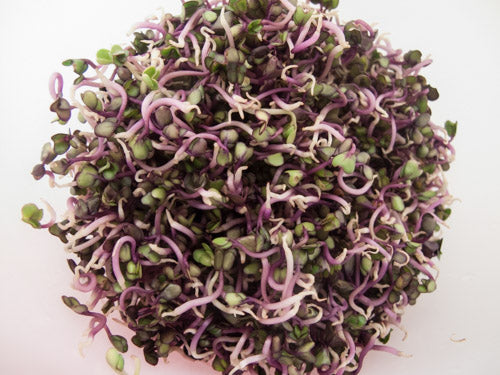
12 hours later.
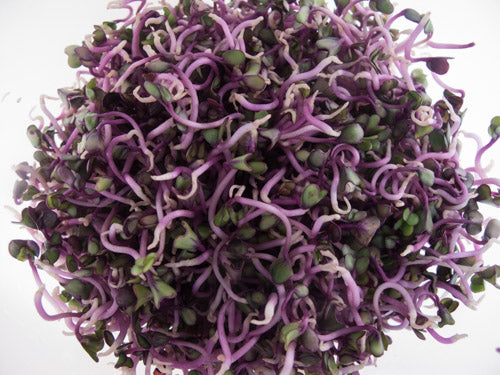
12ish hours later.
You can harvest now if you wish.
It is a good idea to De-Hull your crop.
Here's the deal:
You want to get the hulls out of your crop to increase shelf life after harvest. Here are two ways to do this....
One has to be done now. It's the Bowl Method (described 1/2 way down our De-Hulling page). After doing that, return your sprouts to your Sprouter and Drain especially thoroughly after Rinsing, so your crop can adequately dry before Harvesting.
The other method uses our terrific Salad Spinner/De-Huller. If you have one (or something similar =;-) you can go ahead and grow another 12 hours - especially if you prefer the picture below to the one above.
If you are growing that final 12 hours - proceed to text past the next picture.
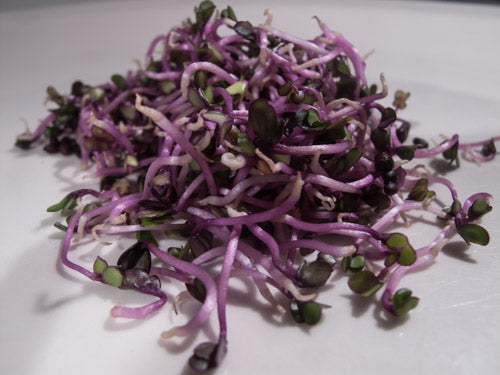
It's harvest time!
If you've got that excellent Salad Spinner/De-Huller, use it now. Remember, the instructions are here, on our De-Hulling page. After that - or if you did the Bowl Method 12ish hours ago - it's time! Now you can put your sprouts in a plastic bag (or better), and put 'em in the fridge.
But, eat a bunch now! They are bursting with flavor, life, love, and nutrients.

The seed of most Brassicas is virtually identical, but this one is Purple Kohlrabi seed. It is awaiting its Soak in an Easy Sprout Sprouter. I only had 1 Tablespoon of seed when I started - as opposed to the 3 Tbs. I would have normally soaked. That's why you can see the Small Seed Insert, which we snap into the bottom of the Easy Sprout when sprouting - - you guessed it - - small seeds..

After an 8 hour Soak, followed by their first Rinse and thorough Draining.

12 hours later, following another Rinse and thorough Draining.

Another 12 hours later, following another Rinse and thorough Draining.

Yet another 12 hours passes....
I think you get the idea - every 12 hours you Rinse and Drain thoroughly.
Be sure to click the Video tab, and watch our scintillating bit of cinema that lives there. It's on growing Broccoli Sprouts, but the process is Identical.
It'll really help you grasp fully what I mean by Thorough.
If you are sprouting in a hot and humid place/time, add a 3rd Rinse/Drain to your daily schedule (8 hours apart of course) - from the time you start and until your crop is done. Sprouts generate a lot of heat as they grow, and Brassicas are cool weather crops, so they very much appreciate being cooled down.

12 hours later.

12 more hours later.

And - another 12 hours passes.

12 hours later I like to partially De-Hull my crop. I say partially, because there will most likely be enough hulls left when harvest time comes, that a thorough De-Hulling will be desirable.
To do thi partial de-hullings, fill your Easy Sprout (you can also do this if you're sprouting in a Jar, but if you're using a Tray Sprouter, skip this step) with water and stir your sprouts up, so hulls can float to the surface where you can skim them off.

12 hours later.

12 hours later.

12 hours later.

12ish hours later.
You can harvest now if you wish.
It is a good idea to De-Hull your crop.
Here's the deal:
You want to get the hulls out of your crop to increase shelf life after harvest. Here are two ways to do this....
One has to be done now. It's the Bowl Method (described 1/2 way down our De-Hulling page). After doing that, return your sprouts to your Sprouter and Drain especially thoroughly after Rinsing, so your crop can adequately dry before Harvesting.
The other method uses our terrific Salad Spinner/De-Huller. If you have one (or something similar =;-) you can go ahead and grow another 12 hours - especially if you prefer the picture below to the one above.
If you are growing that final 12 hours - proceed to text past the next picture.

It's harvest time!
If you've got that excellent Salad Spinner/De-Huller, use it now. Remember, the instructions are here, on our De-Hulling page. After that - or if you did the Bowl Method 12ish hours ago - it's time! Now you can put your sprouts in a plastic bag (or better), and put 'em in the fridge.
But, eat a bunch now! They are bursting with flavor, life, love, and nutrients.
Yields approximately 4 Cups (1/2 lb.) of Sprouts
Seed Prep
Measure out 3 Tablespoons of seed* (slightly heaping) into your Sprouter or a strainer.
Rinse your seeds to remove dust and debris.
Soak
Transfer your seeds into your Sprouter (if necessary), or to a bowl.
Mix seeds up as you slowly add water to assure even water contact for all.
Add 2-3 times as much cool (70-80°F) water. Allow seeds to Soak for 4-12 hours.
Do Not Ever Soak Again. Soaking is done only this one time.
We start counting days at this point - when the Soak is done (post-Soak is the phrase we use).
A crop of Brassica Sprouts usually takes 5 days - from This point in time to harvest.
Sprouting
Empty the seeds into your Sprouter (if necessary).
Drain off the soak water.
You can use it - it has nutrients in it. We use it on house plants.
Rinse thoroughly with cool (70-80°F) water.
Drain thoroughly.
Draining Thoroughly (Maniacally even) is the key to great crops. The smaller the seed (all Brassica Sprouts are small seeds) the more thorough you must be. Do Not skimp on Rinsing - but focus seriously on Draining.
If you need to see what we mean by Thorough Draining - check out our videos.
Set your Sprouter anywhere out of direct sunlight and at room temperature (70° is optimal) between Rinses.
This is where your sprouts do their growing. We use a counter top - in the corner of our kitchen, near the sink. Indirect sunlight is fine, as is your regular room light - because light just does not matter much in the first couple days.
A plant can only perform photosynthesis when it has leaves. Until a plant has leaves, light has little if any effect. Sprouts also happen to like air- circulation, so don't hide your sprouts. When leaves do appear, this will be plenty of light for them to green up. You can of course use Grow Lights if you like.
Rinse and Drain again every 8-12 hours for 3 days.
Ther will be more days - but we'll address them when we get there.
Always be sure to Drain very thoroughly. The most common cause of inferior sprouts is inadequate drainage. Even the best designed Sprouting Device holds water, and Brassicas are particularly needy - especially the first couple days - so pay special attention to this step.
Greening
On the 4th day (post soak) relocate your sprouts, if necessary.
If you've been keeping them away from light - move them. Avoid direct sun as it can cook your sprouts, unless you are growing in a Tray Sprouter - in which case direct sunlight is great. Indirect sunlight is best for non-tray Sprouters but grow lights work well too. Experiment - you will be amazed at how little light sprouts require to green up. Photosynthesis is a marvel!
The center of the crop - when grown in a Jar, Easy Sprout, or other non-tray Sprouter, will remain yellow leaved. We've never minded that, but if you want - you can move your crop around - - likely removing it to a large bowl or pot and then returning it to your Sprouter. Do this as often as you like - or (like us) not at all. Grow vertically in a Tray if this is a real concern for you. We imagine everyone who visits us eats plenty of greens, so chlorophyll isn't something we're short of. As always - do as you wish.
Continue to Rinse and Drain thoroughly every 8-12 hours.
Your last Rinse and Drain will be on day 5 - or possibly day 6 (post Soak).
Always Drain Thoroughly.
Finishing
Your sprouts will be done about the end of day 5.
The majority of sprouts will have open leaves which will be green. You'll recognize them.
De-Hulling
Hulls are the thin coat on a seed. In most cases they seperate themselves from the sprout. They are only a problem when it comes to the shelf life of your finished crop. We've eaten them for years and consider them extra roughage, but the crop looks better and lasts longer without them - so removing them is good. Really, in the case of Brassicas - we suggest you do it. Their hulls are thicker than most seeds, and so reduce the shelf-life of the crop more dramatically.
You may De-Hull your sprouts at any time during day 5.
If you have a Salad Spinner - De-Hulling can be your last step. You can harvest and refrigerate them immediately after you finish.
You can also remove hulls prior to harvest...
If you are growing in a Jar - using the Coarse Mesh Screen will allow some hulls to float out through the screen while Rinsing. Repeating and agitating your sprouts will allow more hulls to escape.
If you're growing in an Easy Sprout Sprouter - transfer your sprouts to the Solid Base, fill with water, and agitate with a fork. This will help hulls get to the surface - where you can skim them off. When you've gotten all you can - move your sprouts back to the Growing Vessel, Rinse again, and Drain Thoroughly.
If you're growing in our Stainless Steel Sprouter you can get rid of most of the hulls by Rinsing Upside Down. Instead of writing words - let us direct you to our short video on the subject - which works well for Brassicas too: Rinsing Leafy Sprouts Upside Down.
Here is our video on De-Hulling.
Harvest
If you Dehulled with a salad spinner - you can go right to refrigeration. If not... Your sprouts are done 8-12 hours after your final Rinse and Very Thorough Draining. If we minimize the surface moisture of our sprouts they store much better in refrigeration, so we let them sit for 8-12 hours after that final - Thoroughly Maniacal Draining.
Storing Your Crop
Transfer your sprout crop to a plastic bag or the sealed container of your choice. If you want extra special bags, we have Produce Storage Bags that can extend shelf life substantially.
Brassica Sprouts are best within a week of harvest, but we've had some crops last for a month in the fridge.
Great work sprout farmer!
*Amount of Seed to Use
* If using Sproutpeople's Single Harvest Pack - use the whole bag (for a one-quart Sprouter). It will produce a crop of approximately 8 ounces.
These seeds yield approximately 4.5:1 - which means the sprouts will weigh 41⁄2 times as much as the seed you start with, but, they will increase even more in volume - so don't start with more than 3 (heaping) Tablespoons per quart/litre of sprouter capacity.
Another hard to get Brassica, Kohlrabi is sweet and cabbagey and comes in a couple colors. We offer Purple Kohlrabi because we love colorful (especially purple) crops, and because we have a good source which is certified organic and not too expensive.
Note: We sell Purple Kohlrabi by the 1/2 pound.
Note: Canadian and US researchers have found that Brassicas contain antioxidants such as sulfurophane.
Kohlrabi is a Brassica.
Seed Shelf Life: 5 years. Store in cool, dark, dry spot. Store in freezer to extend shelf life.
Recommended Sprouters for Kohlrabi Sprouts - Purple Kohlrabi
I especially love the vibrant color and how wonderful these grow you guys supply nothing but top notch seeds!
These seeds sprout a little slowly and unevenly, but they have a certain delicate bitter sweetness that I've come to sometimes crave sprout-wise.They're a bit tinier than broccoli sprouts, which you can't tell from the main photo, and the purple isn't quite so pronounced, it's mainly just along the leaf edges, but in any case, they're tasty and I'm glad took a chance and tried them.
These seeds sprout a little slowly and unevenly, but they have a certain delicate bitter sweetness that I've come to sometimes crave sprout-wise.They're a bit tinier than broccoli sprouts, which you can't tell from the main photo, and the purple isn't quite so pronounced, it's mainly just along the leaf edges, but in any case, they're tasty and I'm glad took a chance and tried them.

