
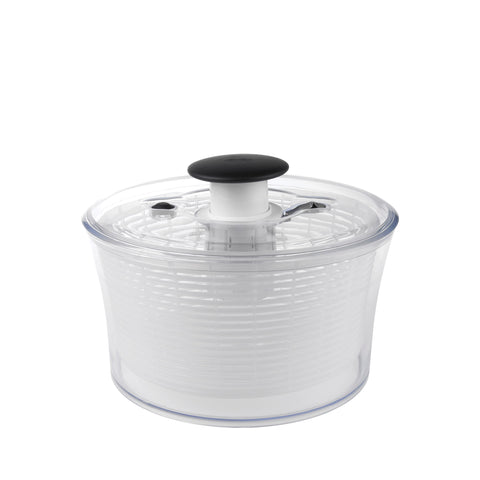
Sprout Dehuller
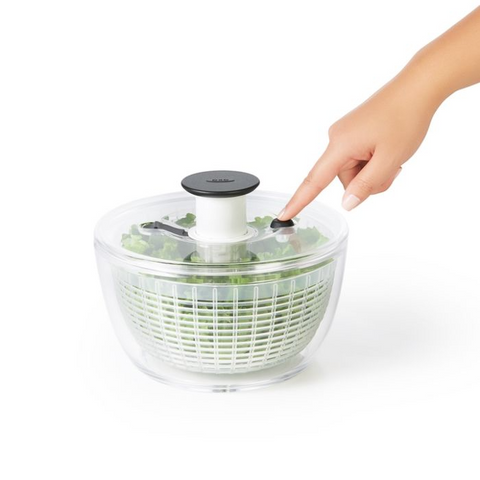
This is a great sprout tool! A device to help you De-Hull and dry your sprouts. This is an extremely well made salad spinner by OXO. We have used the bigger version in our house for many years, but this one is perfect for a crop of sprouts. The idea is to fill the container with water, push the hulls out and then spin the sprouts dry. Doing so will save you from having to wait for 12 hours after your final rinse/drain cycle to refrigerate your crop. This is intended for Leafy and Brassica Sprouts as well as Greens, but will work with most sprouts and Micro-Greens.
Hull Removal
De-hulling is the process of removing hulls (seed coats) from your finished sprouts.
We didn't de-hull much during our years as professional sprout growers. We never bother with Beans, we brush what we can off of our Greens (by holding the tray at a 90° angle and rubbing a hand back and forth over the tops of the plants), and since we grew our Leafy sprouts vertically, the hulls fell off naturally as we rinsed (though we did "shave" them if they needed it - which is really fun!). Now that we are home sprouters only, we usually de-hull our Leafy sprouts, but the only sprouts we always de-hull are Brassicas. Their hulls are quite big (relative to the size of their sprout) and retain too much moisture - which can lessen the shelf life of the sprouts.
The sprouts which are typically candidates for De-hulling are grown from Dicot seeds. Seeds whose 1st leaves (cotyledons (ko-ta-LEE-den)) are the seed itself (Alfalfa, Clover, Brassicas and many garden Beans just to name a few) will shed their hull as the leaves unfurl. Any gardener will know from watching a Bean grow - the plant pokes up through the ground looking like a bean on the end of a stem. The bean on the end of the stem splits in two in short order. That bean is now called the plant's cotyledons. True Leaves will follow and the cotyledons will fall off or die as the plant grows - having done their job - as a seed - being the storage vessel for all of the nutrients needed to germinate and grow the plant to a point where it could gather it's nutrients from the Earth and Sun.
In sprouting we grow plants no further then the cotyledons, and then only with certain seeds. The hulls which are left behind vary from sprout to sprout in regards to texture and density. some seeds - like the Brassicas (Broccoli, Radish, Cabbage, etc.) shed very thick hulls which , if not removed can shorten the storage of your sprouts due to their moisture content. Alfalfa and Clover, as well as Mung Beans have very thin hulls which in no way effect the shelf life of your sprouts, but some people prefer to dispose of them for aesthetic or textural reasons. We leave our Mung's hulls alone and remove our Leafy sprout's hulls only sometimes. In neither case do the hulls decrease the storage life of the crop.
Other sprouts also produce hulls. Lentils and Peas - if grown long enough - will shed their hulls as well. In both cases they are not shed from the cotyledon but from the seed which in field planting stays where it is planted - growing a root down and a plant up from that point. That type of seed is called Monocot. Both of these produce rather thick hulls which you may wish to remove. We don't grow them long enough for the hulls to fall off so we do not remove them, and in any case, we consider the hulls completely acceptable and to be a good source of fibre. You decide for yourself - the method is the same for any sprout - - though frankly, it works poorly for beans - they just don't separate from their hulls well and uniformly enough. Experiment though - - it can't hurt and learning is after all life's main pursuit, no?
 >The Sprout/Salad Spinner Method
This method simplifies the de-hulling process and allows you to refrigerate your sprouts immediately afterwards. And it's fun too, and there is so little sprout paraphernalia....
 |
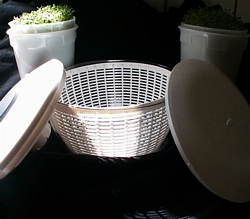
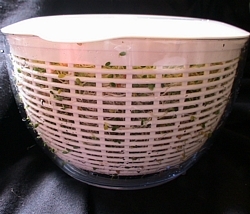
Put the strainer vessel inside the solid base.
Put into your sink. |
|
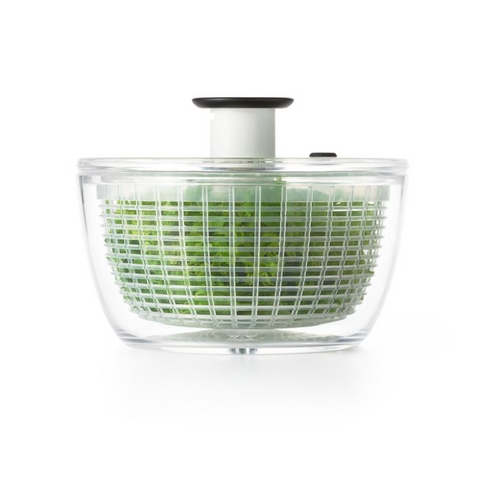
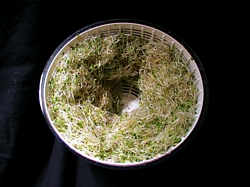
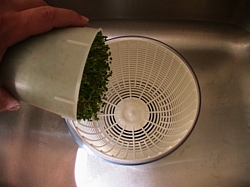 Transfer your finished sprouts into the Salad Spinner.
 |
 You may break the mass apart now or wait for the next step.
 |
|
 |
Fill with cold-cool water. | |
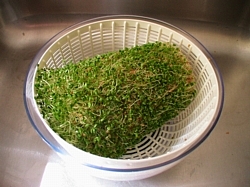
| If you are de-hulling Brassicas or Leafy sprouts break the sprout mass apart - if you haven't yet.
Use your hands to gently pull disentangle them all. This takes a minute or two. Be thorough and enjoy this tactile time with your sprouts. They are alive. The goal is to make the sprouts swim freely - this allows the most hulls to be cleaned out of the crop. |
 |
|
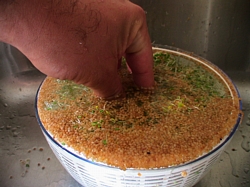 |
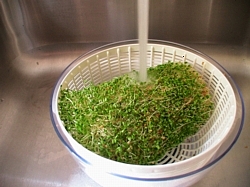
Swish the sprouts around with your hand (you did wash your hands didn't you =;-) for a 20 seconds or so. You will see the top of the water become covered with hulls. | |
| Now, this is where this device really improves on the bowl method; Push the sprouts down. Most of the hulls will just flow over the sides!
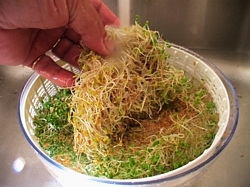
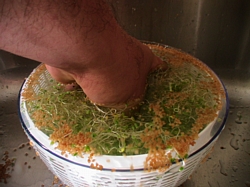
Look at the swimming sprouts to see if they look hull free enough for you. You can be done now, or add some more water (to make up for what you just displaced) and swish again. You can do this as long as you wish. You may want to try pulling more sprouts apart if you feel they are not as free as possible. For me this is fun, so I do it several times. I just can't get over how easy de-hulling is with this device! |
 |
|
 |
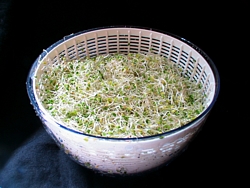
When you are satisfied - or just out of time - lift the Strainer out. You will find some additional hulls and un-sprouted seeds at the bottom of the water in the Solid Base. Toss the hulls in your compost or garbage. If you have a disposal, be sure to run it plenty. You do not want sprouts growing in your disposal - the running water rinses them and they continue to grow. One person told us that theirs filled with sprouts. We've never had that happen to us, but better safe than... | |
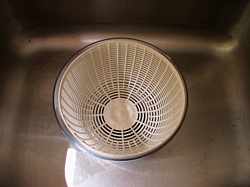
| Rinse out the Solid Base.
Set the strainer back into the Solid Base. |
 |
|
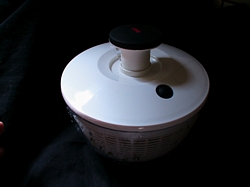 |
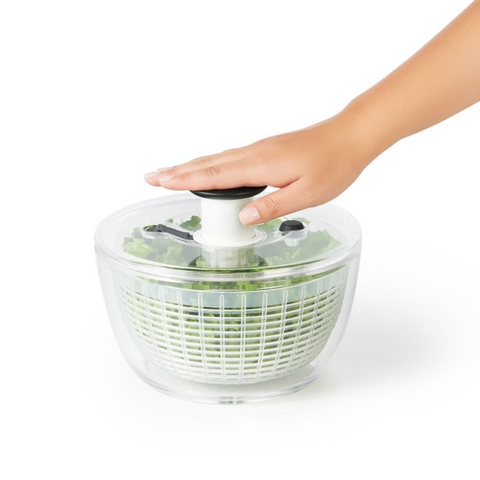
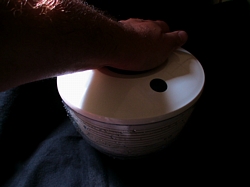
Put the top on.
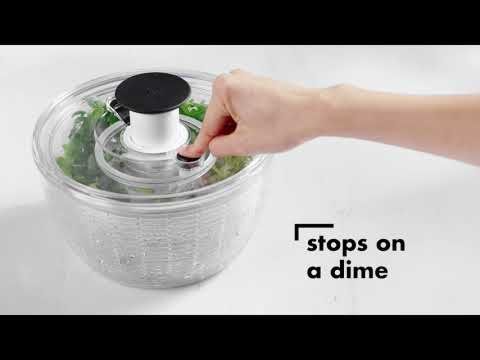
Pop the spinner mechanism up by releasing the plastic lock that holds it down. |
|
| Put your palm on the upraised black circle and push. Push down every time it pops up. This centrifugal draining is what large scale commercial sprouters do - albeit in a bigger machine. When you are satisfied that your sprouts are dry enough, stop spinning.
You can press the little black circle - it is the Brake. Don't lift the lid while the Strainer is spinning - sprouts will fly out. You can pour the water out of the Solid Base and repeat again to make sure you have achieved maximum dryness. |
 |
|
 |
Your sprouts won't be bone dry, but they will be dry enough to refrigerate.
The 1st time you do this, do repeat the spinning part of the process a few times. You will see how little water comes off the sprouts the more you repeat the spin. You'll soon grow accustomed to the device and will wonder how you ever de-hulled without it. |
|
| You can transfer your sprouts to a plastic bag or another suitable container and refrigerate them. We sell some great produce storage bags too.
You may also use the Flat Lid that came with your OXO Spinner (Please Note: as of 2008 the spinners no longer come with the Flat Lid. You can use the spinner top of course) - it also makes a great storage container. If you choose this - pour off the water in the Solid Base before refrigerating. |
 |
|
| To clean the Spinner we find our sinks spray attachment to be the easiest solution. You will still have to pick a few clinging sprouts off, but we feel this little bit of annoying work acceptable given how much we love de-hulling with this device. | ||
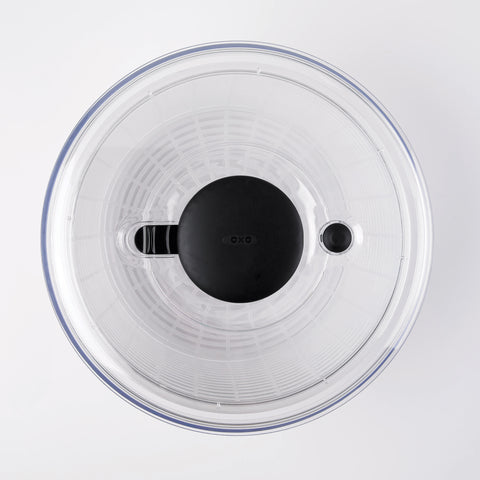
De-Huller/Sprout & Salad Spinner made by OXO Its full name is Good Grips Little Salad & Herb Spinner - but to us Sproutpeople, it's a De-Huller. It is made - as are all OXO products - extremely well. It measures 8 inches in diameter, 5 inches tall. Its Capacity = 2 Quarts
FOR USE WITH THESE SEEDS/CROPS
Leafy Sprouts Brassica Sprouts Greens Micro-Greens and leafy vegetables, of course.
Why, oh why, did I wait so long to get this?!!!! I used to kind of dread the dehulling process but not anymore! This is so awesome! It’s a game changer if you’re growing sprouts. I have an old larger oxo spinner as well and have been making do with it. But it is cumbersome and clunky for dehulling a small batch of sprouts. This is SO much better, easier and it’s easy to clean. Its operation is super smooth. I love this and highly recommend it for anyone who’s growing sprouts and needs to dehull them
Why, oh why, did I wait so long to get this?!!!! I used to kind of dread the dehulling process but not anymore! This is so awesome! It’s a game changer if you’re growing sprouts. I have an old larger oxo spinner as well and have been making do with it. But it is cumbersome and clunky for dehulling a small batch of sprouts. This is SO much better, easier and it’s easy to clean. Its operation is super smooth. I love this and highly recommend it for anyone who’s growing sprouts and needs to dehull them
I like this little salad spinner, sprout de-huller a lot. It’s the perfect size to quickly remove those pesky hulls. I dump the sprouts in, fill with water, and swirl my hand around for about 30 seconds. As the hulls float to the surface, I spoon off right back into the jar they came from. After a quick spin or two I dry my sprouts on paper towels for a few minutes and then in the fridge - or my salad - they go. The design on this genius device is great for a quick wash and no worries. Here’s a quick tip to remove the few sprouts that get stuck in the plastic strainer basket. Fill halfway with soapy water, hold about an inch above the solid bowl and swirl rapidly until you have a clean basket. Back for my second one to do two crops at a time. :))
I like this little salad spinner, sprout de-huller a lot. It’s the perfect size to quickly remove those pesky hulls. I dump the sprouts in, fill with water, and swirl my hand around for about 30 seconds. As the hulls float to the surface, I spoon off right back into the jar they came from. After a quick spin or two I dry my sprouts on paper towels for a few minutes and then in the fridge - or my salad - they go. The design on this genius device is great for a quick wash and no worries. Here’s a quick tip to remove the few sprouts that get stuck in the plastic strainer basket. Fill halfway with soapy water, hold about an inch above the solid bowl and swirl rapidly until you have a clean basket. Back for my second one to do two crops at a time. :))
This is an excellent spinner and I do love it for de-hulling small seeds that have been grown to one inch plus. I can also store the grown sprouts in there in the fridge better than other methods (though you have to have the space in your refrigerator. To my surprise, I also found this spinner to result in the most success I've had with cress! It happened by accident, but I will be using it regularly now that I've discovered how it offers adequate drainage. I'm just ordering a couple more spinners. They fit in my EasyGreen, so I can really just walk away from the process and let the technology do the rest!
