Popcorn Shoots
Red, White and/or Yellow Popcorn
Regardless of color, we stock popcorn that grows shoots well. Since 2007, red has been tough to find, so we have had White or Yellow since.
Vitamins A, B, C and E
Calcium, Chlorophyll, Iron, Lecithin, Magnesium, Pantothenic Acid, Phosphorus, Potassium
Trace Elements
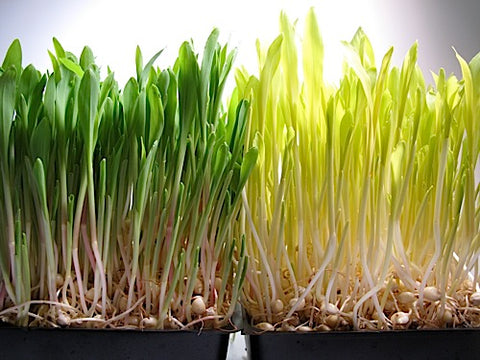
Sweet, sweet, green, green.
The time it takes to grow a finished 8 - 12 days, or other crop (Micro-Greens, Grass, Greens) from a dry Seed. Note: This "finished" Sprout is our preference. you may grow them for as long as you want! In fact, we suggest that you taste them at every rinse to discover when you like them best.
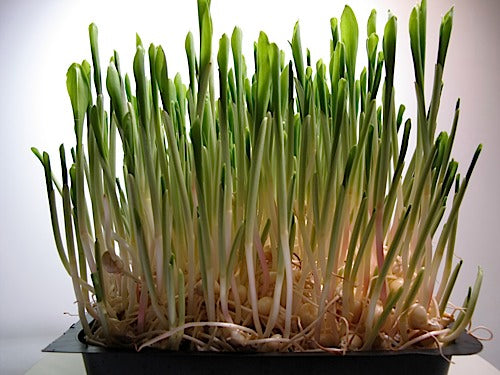
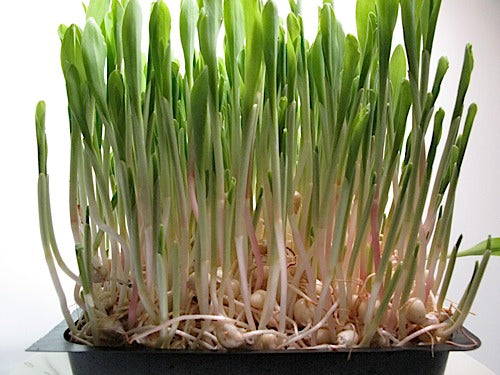
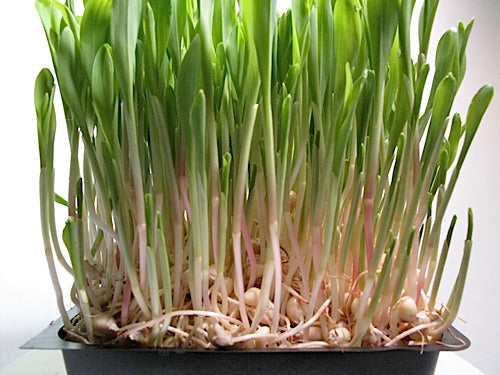
How to Grow Popcorn Shoots
- Soak 1/4 cup of seed in cool water for 8-12 hours.
- Drain off soak water. Never Soak them again.
- Rinse thoroughly.
- Drain thoroughly.
- Rinse and Drain with cool water every 8-12 hours - until your seeds have the tiniest root showing.
- Plant on a thoroughly moistened medium.
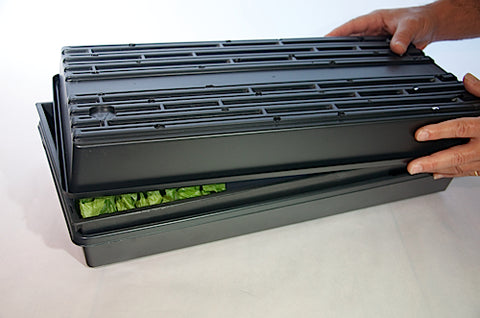
- Cover your crop with another tray or plate, to keep light out and moisture in.
- Keep your medium moist by watering lightly as needed. Don't drench!
- When your plants have begun to show leaves, remove cover and move your crop to a well lit location.
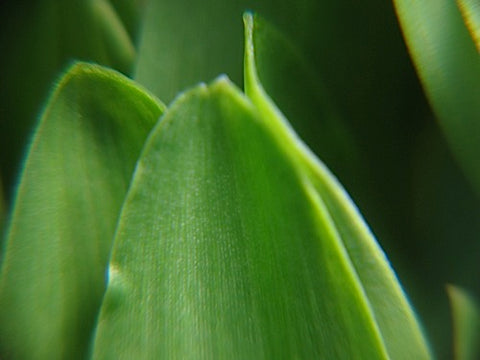
- Harvest when the leaves are open and most of them are green.
- Cut just above the medium, with a scissors or sharp knife.
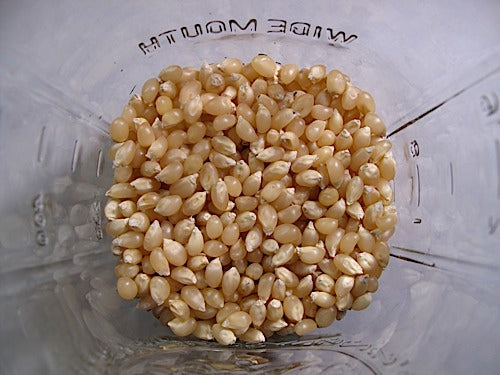
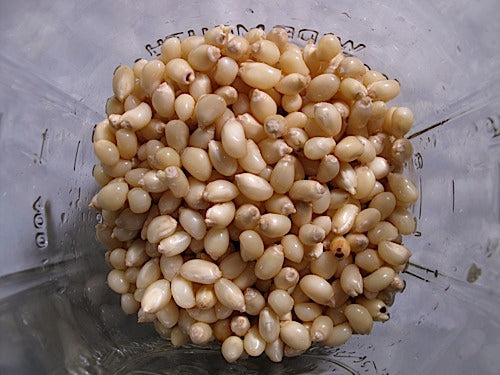
Dry Popcorn await their Soak.
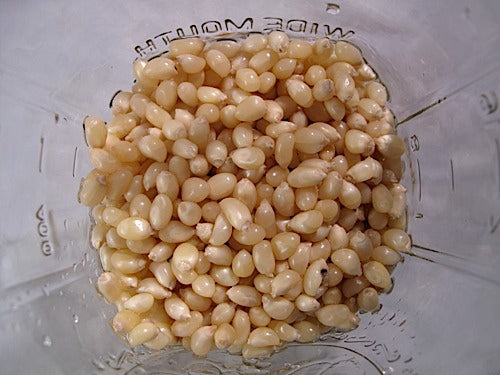
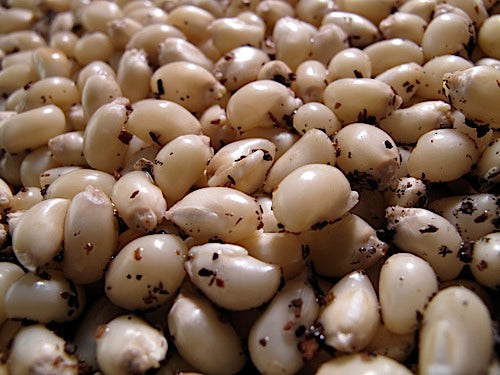
12 hours later... Soaked, Rinsed and Drained.

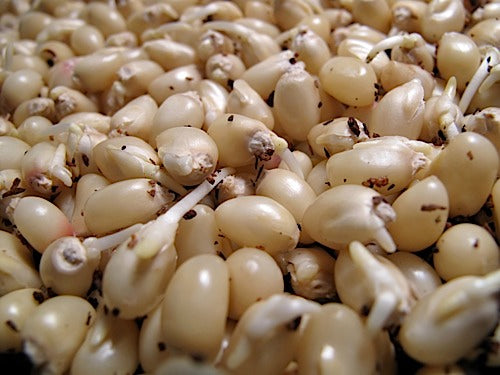
12 hours later... another Rinse/Drain cycle. If you see the roots beginning to emerge, plant now. Or....
12 hours later... another Rinse/Drain cycle.If you chose not to do so 12 hours ago, NOW is the time to Plant.
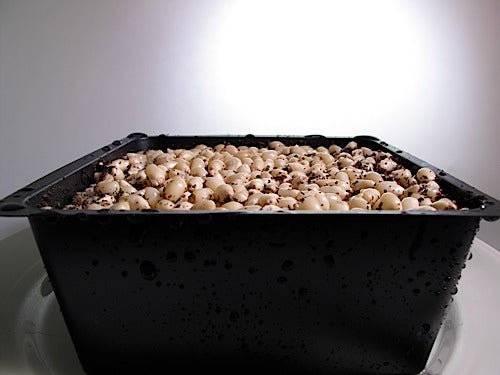
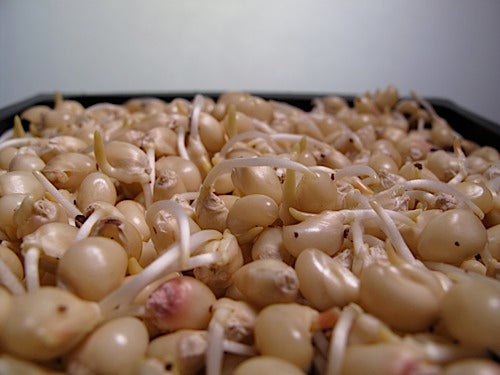
We planted our barely sprouted (pre-sprouted) Popcorn atop the thoroughly moistened medium of our choosing, then watered it and covered it. Now - 12 hours later you can see serious growth and Root Hairs too.
Another view of our just planted Popcorn.
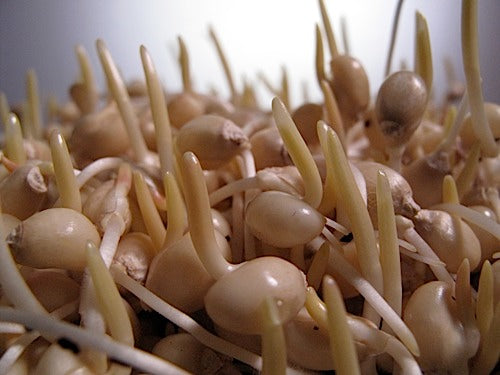
24 hours later...
24 hours later...
24 hours later...
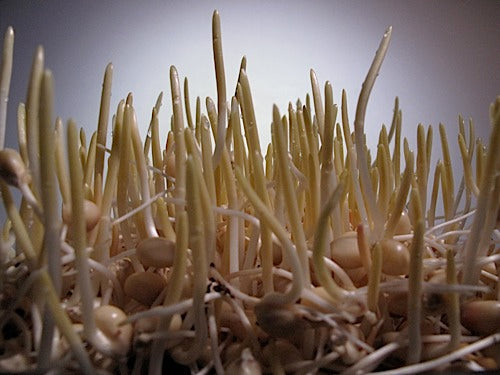
24 hours later...
24 hours later...
24 hours later...
24 hours later...
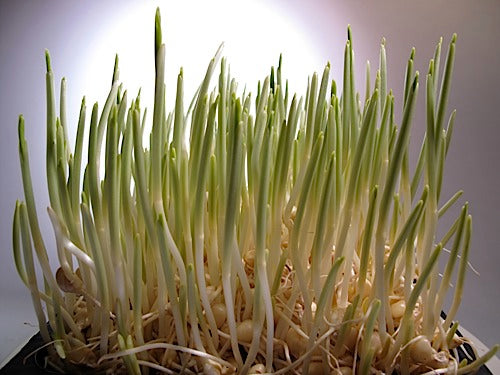
Harvest Time!
Dry Popcorn await their Soak.
12 hours later... Soaked, Rinsed and Drained.
12 hours later... another Rinse/Drain cycle. If you see the roots beginning to emerge, plant now. Or....
12 hours later... another Rinse/Drain cycle.If you chose not to do so 12 hours ago, NOW is the time to Plant.
We planted our barely sprouted (pre-sprouted) Popcorn atop the thoroughly moistened medium of our choosing, then watered it and covered it. Now - 12 hours later you can see serious growth and Root Hairs too.
Another view of our just planted Popcorn.
24 hours later...
24 hours later...
24 hours later...
24 hours later...
24 hours later...
24 hours later...
24 hours later...
Harvest Time!
How much seed you Soak depends on the area you are planting - see here. Yields vary depending on method used, climate and technique, but are roughly 1 pound of Greens per pound of seed planted.
Pre-Sprout
When growing Popcorn Shoots: You really MUST Pre-Sprout before planting.
Put seed* into a bowl or your Sprouter. Add 2-3 times as much cool (60-70 degree) water. Mix seeds up to assure even water contact for all. Allow seeds to Soak for 8-12 hours.
Empty the seeds into your Sprouter (if necessary). Drain off the soak water. You may water plants or use it in stock if you like - it has nutrients in it. Rinse thoroughly with cool (60-70°) water then Drain thoroughly. Set your Sprouter anywhere out of direct sunlight and at room temperature (70° is optimal) between Rinses. This is where your sprouts do their growing. We use a counter top - in the corner of our kitchen, but where the sprouter won't get knocked over by cats, dogs, kids or us. We don't mind the indirect sunlight or the 150 watts of incandescent light, because light just does not matter much. A plant can only perform photosynthesis when it has leaves. Until then light has little if any effect. Sprouts also happen to like air-circulation, so don't hide your sprouts. We'll get to the light later, after planting our Greens.
Rinse and Drain again in 8-12 hours. And, perhaps one more... Rinse and Drain in 8-12 hours. And, conceivably one more... Rinse and Drain in 8-12 hours.
When most of the seeds have sprouted tiny (1/8-1/4 inch) roots, or even better, when they are just showing the hint of a root, it is time to plant. This is typically after just 2-3 Rinse and Drain cycles.
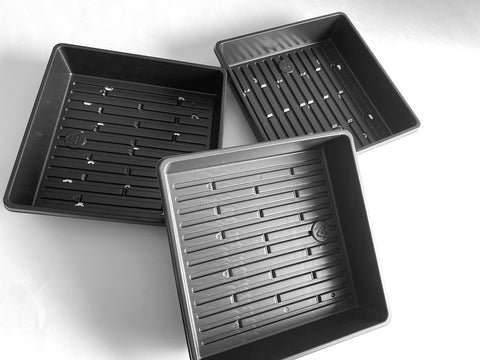
Planting and Growing
Soil Note: The amount of soil you use is up to you. The reality is this: As your plants grow they need more and more water. They get their water from the soil. The more soil you use - the more water it can hold = the less you need to water.
Thoroughly moisten the soil. Allow puddles to dry. Sometimes you may need to use your fingers to make sure the soil is moist all the way down to the bottom of the tray. Water, mix, water, mix, etc. Sometimes you don't have to do that. Earthworm castings tend to be quite dry. If you are using them, you should add very small amounts of water to them, a little at a time, until they are moist and fluffy. They will be much easier to mix with your other soil. Remember - do not exceed 20% Earthworm castings in your soil mix. You don't want to burn your Greens.
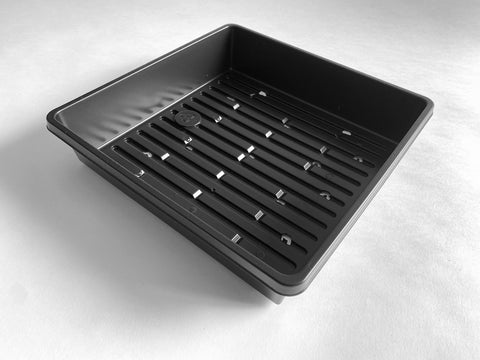
Baby Blanket: Prepare the pad: Cut it to fit your Tray if necessary. Soak it in water or better yet, Kelp Fertilizer enriched water (You don't NEED fertilizer, but we use it when we grow without soil.) until thoroughly saturated (fold it up and push it into the liquid - use a pot or something similar to hold it). Unfold it and re-fold differently or do whatever makes sense - the goal is to get the pad THOROUGHLY soaked. Spread the wet pad across the bottom of your Planting Tray. Proceed...
Vermiculite: Vermiculite absorbs liquid so readily and holds it so thoroughly that you need less Vermiculite than you would soil. We use 3 Cups for an 10 x 10 inch tray and 6 Cups for an 10 x 20 inch tray. If you're using another size tray, make it 1/4 - 1/2 inch deep. Spray water evenly across the surface then spread it out as evenly as you can. We like to use Kelp Fertilizer enriched water (You don't NEED fertilizer, but we use it when we grow without soil.) so we just pour it on until thoroughly saturated and then spread it out. The amount of liquid is this: a little more than one quart for an 10 x 20 inch tray. You don't want more than a little left in the Drip Tray. Pour off what water remains above the ridges of the Drip Tray. Proceed...
Spread seeds evenly on thoroughly moistened soil/medium. We use a lot of seeds and though some literature will tell you that your seeds should not ever lay atop each other, we have found from years of experience and thousands of pounds of Greens grown that that is bunk! You will learn for yourself that some Greens (like these) produce a plant that takes up less room than the seed and so, to maximize your yield, your seeds must lay atop each other to some degree. The thing to watch is this: If you find mold or fungal problems in your Greens then lessen the amount of seed you plant. The hotter/more humid your climate is the more of an issue the mold/fungus is. As always, you need to adapt to your own climate and seasonal conditions. And learn as you go - this is really easy and fun stuff to learn, and what is better than learning?!
Cover the planted tray with an inverted tray (the Cover Tray) - to keep light out and moisture in. Your covering tray should have holes or slits in it so that some air circulation exists. Without this very minimal air flow you might have mold or fungal problems.
Place in a low-light, room temperature location. 70° is always optimal but these Greens will grow very well in cooler or slightly warmer temperatures also.
Water lightly once or twice a day. The goal is to keep the sprouts moist until their roots bury themselves in the soil/medium - at which point your goal is to keep the soil/medium moist. Spraying the sprouts is best - whether you use a garden hose sprayer, hand sprayer or faucet sprayer - just try to make sure that every sprout gets rinsed and quenched until they bury their roots. You may use Kelp Fertilizer if you like.
Water the medium. Once the roots are buried all you need to do is keep the medium moist - the seeds and subsequent Greens will get the moisture they need through their roots. Water from the side if possible, to prevent injuring the tender Plants.
The Soilless alternative. Vermiculite holds water better than anything, while Baby Blanket will dry out more quickly than soil in most circumstances, so you should either water more often - or - experiment with our somewhat risky trick:
Use the Drip Tray to hold some water. The roots will actually sit in this, so don't go crazy - too much can drown your plants and/or lead to fungal or mold problems. Just leave as much water as the Greens can drink in a day and then add more the following day. The amount is dependant on the climate (humidity especially) you're growing in, so you'll have to learn this for yourself. We suggest that you start with 1-2 cups in the Drip Tray. Lift the Planting Tray to see how much is left after 4, 8 and 12 hours. If the Drip Tray is dry add more water - if there is still water 24 hours later then cut back the next time you add water. Pretty simple really, and not as risky as we make it sound - it is really a time saver and produces happy healthy Greens.
Once again, we do recommend Kelp Fertilizer enriched water for soilless growers. Soil growers may use it too of course, but the soil does have some nutrients already, so it is not nearly as important for you.
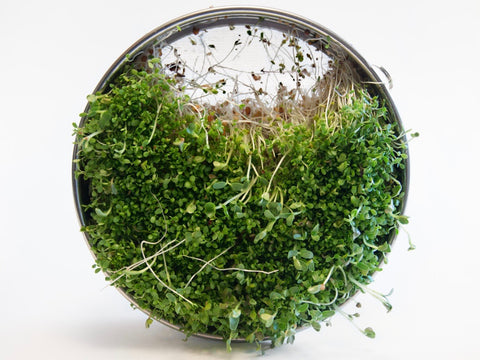
Greening your Greens
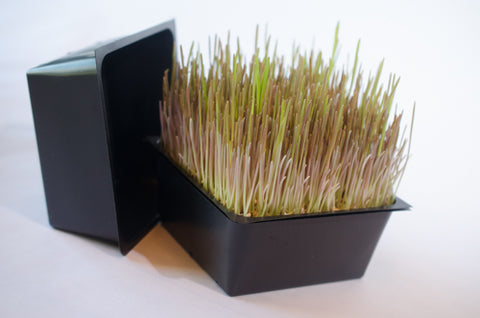
Uncover your Greens. After 3-4 days, or when they are about an inch tall, or when they push the covering tray up (they really will do that - it is cool!)
Move your crop to a well lit location. If you use direct sunlight (a very good idea for Greens) be prepared to do more watering. Keep the soil/medium moist by watering the soil/medium daily. Watch them grow.
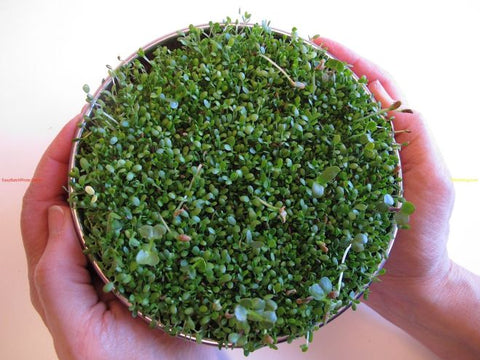
Harvest
Harvesting your crop is just a matter of cutting the plants when they are about 2-4 inches tall and have green leaves. Cut the plants just above soil or medium's surface.
Refrigerate If you are going to store your crop; during the final 8-12 hours minimize the surface moisture of your Greens - they will store best in your refrigerator if they are dry to the touch. So when you water - try to keep the water off the plants - just water the soil/medium, like we said above.
Transfer your crop to a plastic bag - or better yet try our some Produce Storage Bag (they actually extend the shelf life of produce - we use them in our house). Whatever sealed container you choose - put them in your refrigerator.
Dry Seed to start with * If using Sproutpeople's Single Harvest Pack, use the whole bag on our 5 inch tray (or similar).
Or Use:
1/4-1/3 cup for a 5" square Tray. 1-1 1/2 cup for an 10" square Tray. 2-3 Cups for an 10 inch x 20 inch Tray.
The surest way to know what amount of seed to use: Spread dry seed on the bottom of that in which you will be growing (i.e. your tray) so that the seed is spread evenly but densely.
Once more time: We use a lot of Seeds and though some literature will tell you that your seeds should not ever lay atop each other, we have found from years of experience and thousands of pounds of Greens grown that that is bunk! The thing to watch is this: If you find mold or fungal problems in your Greens then lessen the amount of seed you plant next time. The hotter/more humid your climate is the more of an issue the mold/fungus is. As always, you need to adapt to your own climate and seasonal conditions. And learn as you go - this is really easy and fun stuff to learn!
Used for many years in European cuisine, Popcorn Shoots are rapidly gaining popularity in fine US restraunts. The shoots are amazingly sweet! They are most tender when light is withheld - this is called Blanching. Popcorn Shoots are not for everyone. They are easy to grow but their sweetness is intense. They are very cool looking and make a groovy garnish for any dish!
Planting Density
The more densely you plant the seed the less air circulates around the individual plants. This can cause some fungal growth - we call it “fuzzies”. This is not a problem, except that it is unattractive. Some crops will have mold or rot issues. That is a problem. If you get brown pockets at the soil level, where the plants just die, you are probably in need of more air circulation, so plant fewer seeds next time. If you do encounter rot spots like that, scoop them out - if you're growing on a fluffy medium, and try to nurse your crop to completion. In summer we grow our Greens outside (from the point when we uncover the tray) for optimal air circulation.
Planting Medium
We have grown Greens - on soil - in Trays, for almost 2 decades. But, we now have options. We have multiple Soilless Mediums (including Hemp Felt and Vermiculite), and organic liquid Kelp Fertilizer to provide your plants some nutrients to draw upon as they grow. Hemp Felt is a thin organic material that you soak before planting upon. It holds moisture and is the least messy and compact medium we know of. Vermiculite is a mineral which holds moisture supremely, dispenses added nutrients over time and in general acts much like soil. We think you should try all of them if you can - there are differences and though they are minimal you may prefer one method over the other.
Instructions are pretty much the same, regardless of what medium you use, but we have specified differences where they exist. We may be offering other, or different Mediums (products are always coming and going) then when we wrote these instructions, or you might be using one you got somewhere else. Please follow our instructions that refer to Hemp Felt for other thin mediums (i.e. STG Pads). Consider Perlite, Potting Soil or other such fluffy mediums to be the same as Vermiculite, and so follow directions labeled for Vermiculite. There may be some small differences, but they're likely to be minor.
Virtually any soil will do for Greens. We used sterile composted cow manure for the tens of thousands of Trays we grew during our days as professional growers, but any sterile bagged soil will do, and should be available at any garden center, and be inexpensive (depending on the general cost of living where you are of course). You can use expensive soil if you prefer - we might even be selling some - it is your choice - always. The deal is this - Greens (garden greens anyway) are aided by the presence of the nutrient Nitrogen, in the soil. Nitrogen is the nutrient responsible for plant growth (a very good thing when growing lettuce, spinach, collards or other leafy crops, but too much nitrogen is bad if growing peppers or tomatoes or any plant where the fruit is what we eat). Manures contain varrying amounts of nitrogen depending on the animal that originally produced it. Too much nitrogen will burn plants - almost literally burn them - hence the word HOT is used in reference to nitrogen. The higher the nitrogen content the HOTTER the manure (or fertilizer) is considered. Cow manure is the least hot - it was perfect for our needs - it supplies the growing plants with a little extra boost. Chicken, other bird manures and Bat Guano (another word for manure) are much hotter, and Earthworm castings are hotter still (castings is yet another word for manure). The catch is this: Greens, Grass and Sprouts are theoretically all too young to benefit from nitrogen and other nutrients. It is written that every seed has, within itself, all the nutrients it needs to grow to the cotyledon stage. That's as far as we grow any of our seeds (with the sometimes exception of Micro-Greens). So - though it is contradictory, it is our experience that nitrogen does help Greens in some cases (most obviously when growing Sunflower Greens). Like we always say - EXPERIMENT FOR YOURSELF. Draw your own conclusions. If you are familiar with our rap on Dogma, you'll agree with us when we say; Just because it is written does not mean that it's so. Whatever the reality - a little nitrogen can't hurt. Wouldn't it be fantastic if we could get our teenagers to use the words Guano or Castings instead of %&$# when they get ticked off?;-D
Hydroponic Greens
We do not grow hydroponic Greens. We have tried but have never gotten the yields we get with soil, and the flavor of the crops is nowhere near as fine. They taste watered down. Now that we have a soilless alternatives (Hemp Felt, Vermiculite, etc.) we are even less interested in hydroponic Greens growing. But, if you want to try - go to Val at Go Green/Green Smoothie - she is the queen of home hydroponics. Tell her us Sproutpeople sent you!
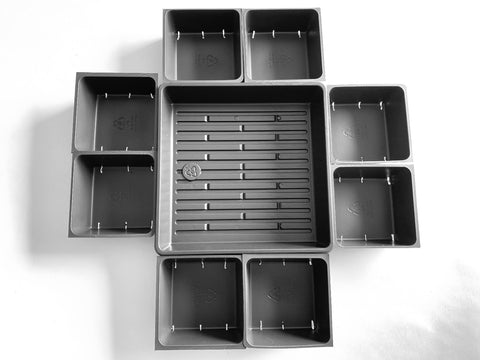
Tray Note
Your Planting Tray (the one with the soil or medium in it) MUST have drainage holes or slits! Nothing will grow in a medium that can not drain - that condition is commonly called "flooded". When using Hemp Felt or Vermiculite your Planting Tray must also have drainage, but we do use the Drip Tray to hold some water at times in the growing process. (You'll see the TIP in our instructions, above.)
As I've said time and time again on the site, we hate dogma, so take my dogma with a grain of salt. You can grow in trays without drainage (the amazing people at the Hippocrates Health Institute have long done so), but you do have to be able to drain excess water away. Tipping is a possibility, but we think it risky - especially for the novice grower, hence my dogma.
Re-Growing Your Crop
Greens can produce a 2nd - so you may continue to water after you cut your first crop. The 2nd and crop will not be as tender, and it may have fungal problems, but it is good to try growing a 2nd crop. Decide for yourself if it is worth it! Vermiculite is the best medium, as far as water retention is concerned - which is a very big deal if you want to go for multiple cuttings, but soil enriched with Earthworm Castings is perhaps a better choice as it gives the Greens nutrients to draw upon. Soil enriched with Earthworm Castings and with about 10-20% Vermiculite might be perfect. Funny that never occurred to me before.... Whatever you use, it's worth a try if only for the experience and the knowledge gained.