
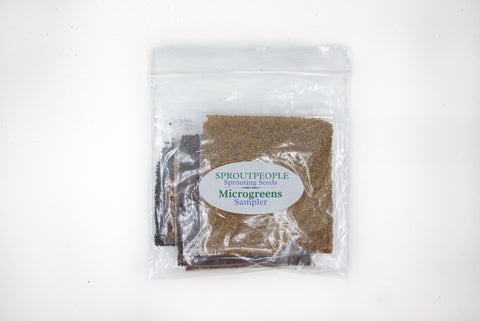
Micro-Greens Sampler
NOW WITH 50% MORE SEEDS...
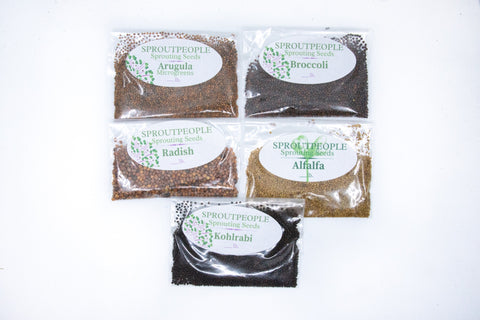
One Tablespoon (2 crops worth) each of Alfalfa, Arugula, Broccoli, Cress or Purple Kohlrabi & Radish. We substitute varieties on occasion - if we are out of something.
Every living seed will grow into a plant. When that seed is small we call the first stage of the plant a Micro-Green. There are many seeds you can grow this way. This Sampler will give you a tiny taste of what these little plants have to offer. Get to know Micro-Greens.
Note: This Sampler is made up of 5 One Tablespoon Packs.
*Each Tablespoon will plant up to 40 sq. inches.
For Sprouting Instructions, click the name of the Seed or Mix you want to grow.
The Seeds
Alfalfa
Though most famous as a Leafy Sprout, Alfalfa is also consumed by humans as a grown plant in some parts of the world. It makes for an easy introduction to the difference between sprouts and Micro-Greens, as it is simple to grow and - assuming you are familiar with the flavor and texture of Alfalfa Sprouts - you will discover what makes these two ways of growing a seed into a plant unique.
Arugula
This mildly spicy Brassica (the same family as Broccoli, Cabbage, Mustard, Radish...) has one of the greatest flavors on earth! Arugula is a very fast grower which shouldn't be soaked (when grown alone) because it is mucilaginous. Just sprinkle some seeds on moist soil or a thoroughly moistened Hemp Bag or other medium, or our small but attractive Micro-Greens device; the Compostable Tray, and watch your crop grow - in just 5-7 days - into the tastiest green food you've ever experienced. Once you have enjoyed Arugula you won't be able to imagine life without it! The secret ingredient in our French Garden Mix, Arugula was not available as an organic crop back in 1994. Working for years with our dear farmer friends Mark + Ila we have established it as a standard certified organic crop which has been added by many a wise sprout grower to their ingredient list. Arugula along with Cress (which has exactly the same organic history), Onion and Garlic Chive are without a doubt the most essential flavor additions to any sprout kitchen, but to us Arugula is the most essential and unique!
Broccoli
Famous for it's antioxidant content; Broccoli sprouts contain something like 50 times the sulfurophane found in mature broccoli, by weight. Broccoli Greens haven't been researched to the best of our knowledge, so we can't be sure of nutritional specifics - but they are wonderfully tender and tasty - especially if you like broccoli.
This is the Organic Broccoli we have been looking for! It is as vigorous and delicious as our long-time conventional Broccoli. It comes from a farmer who is fairly new to us, and though we like him and his family very much, until we forge a relationship and see that he can meet our seed needs, demand and quality wise, we continue to offer our conventional Broccoli as well. This is far-and-away the best organic Broccoli we have ever enjoyed. It is ever so slightly more spicy than our conventional Broccoli.
Cress
Also known as Pepper Grass, this spicy Brassica is, in flavor, something like Watercress. There is no other flavor quite like the Cress'. They are fantastic! It is a very fast grower which (since it is mucilaginous) must not be soaked when grown alone. Just sprinkle some seeds on moist soil or similar medium, a thoroughly moistened Hemp Bag or other medium, or our small but attractive Micro-Greens device; the Compostable Tray, and watch your crop grow - in just 5-7 days - into a wonderfully tasty Micro-Green which will become a necessary ingredient in your sprout kitchen. Also a great crop to grow in your office along with other Micro-Greens, especially if you use our Compostable Tray!
Purple Kohlrabi
Mild, sweet, flavor similar to other Brassicas. Purple Kohlrabi produces a lovely Micro-Green with stunning purple stems!
Radish
An exceptionally tasty and aromatic Brassica, Radish is a staple to us - and every other professional sproutperson. Micros will be milder than (not as hot) the sprouts produced by these same seeds. Radish Micro-Greens are a beautiful addition to salads, tea sandwiches, or as a garnish for any gourmet plate. We provided Radish sprouts, and later these Micro-Greens to a world class French restaurant (L'etoile) in Madison, Wisconsin. The Owner and Head Chef, Odessa Piper (voted best chef in the Mid-West in 2001) used them as a garnish, circling some of her already awesomely beautiful plates.
8/2022 - NOW WITH 50% MORE SEED - - A fine introduction to Sproutpeople's growing selection of Micro-Greens. This sampler can be quite an education - providing you experience with growing, and a small taste of the potential of Micro-Greens.
For Growing Instructions, click the name of the Seed or Mix you want to grow.
The Seeds
Alfalfa
Though most famous as a Leafy Sprout, Alfalfa is also consumed by humans as a grown plant in some parts of the world. It makes for an easy introduction to the difference between sprouts and Micro-Greens, as it is simple to grow and - assuming you are familiar with the flavor and texture of Alfalfa Sprouts - you will discover what makes these two ways of growing a seed into a plant unique.
Arugula
This mildly spicy Brassica (the same family as Broccoli, Cabbage, Mustard, Radish...) has one of the greatest flavors on earth! Arugula is a very fast grower which shouldn't be soaked (when grown alone) because it is mucilaginous. Just sprinkle some seeds on moist soil or a thoroughly moistened Hemp Bag or other medium, or our small but attractive Micro-Greens device; the Compostable Tray, and watch your crop grow - in just 5-7 days - into the tastiest green food you've ever experienced. Once you have enjoyed Arugula you won't be able to imagine life without it! The secret ingredient in our French Garden Mix, Arugula was not available as an organic crop back in 1994. Working for years with our dear farmer friends Mark + Ila we have established it as a standard certified organic crop which has been added by many a wise sprout grower to their ingredient list. Arugula along with Cress (which has exactly the same organic history), Onion and Garlic Chive are without a doubt the most essential flavor additions to any sprout kitchen, but to us Arugula is the most essential and unique!
Broccoli
Famous for it's antioxidant content; Broccoli sprouts contain something like 50 times the sulfurophane found in mature broccoli, by weight. Broccoli Greens haven't been researched to the best of our knowledge, so we can't be sure of nutritional specifics - but they are wonderfully tender and tasty - especially if you like broccoli.
Cress
Also known as Pepper Grass, this spicy Brassica is, in flavor, something like Watercress. There is no other flavor quite like the Cress'. They are fantastic! It is a very fast grower which (since it is mucilaginous) must not be soaked when grown alone. Just sprinkle some seeds on moist soil or similar medium, a thoroughly moistened Hemp Bag or other medium, or our small but attractive Micro-Greens device; the Compostable Tray, and watch your crop grow - in just 5-7 days - into a wonderfully tasty Micro-Green which will become a necessary ingredient in your sprout kitchen. Also a great crop to grow in your office along with other Micro-Greens, especially if you use our Compostable Tray!
Purple Kohlrabi
Mild, sweet, flavor similar to other Brassicas. Purple Kohlrabi produces a lovely Micro-Green with stunning purple stems!
Radish
An exceptionally tasty and aromatic Brassica, Radish is a staple to us - and every other professional sproutperson. Micros will be milder than (not as hot) the sprouts produced by these same seeds. Radish Micro-Greens are a beautiful addition to salads, tea sandwiches, or as a garnish for any gourmet plate. We provided Radish sprouts, and later these Micro-Greens to a world class French restaurant (L'etoile) in Madison, Wisconsin. The Owner and Head Chef, Odessa Piper (voted best chef in the Mid-West in 2001) used them as a garnish, circling some of her already awesomely beautiful plates.
I apologize for repeating myself, but I want to be certain you realize this item is SEEDS ONLY. There are no Sprouting Devices or Mediums included with this item. If you want everything you need, along with these seeds, buy our Master Microgreens Kit or Mini Microgreens Kit
