
Sprouting Jar - 1 Quart
Keeping these in-stock is ridiculously challenging nowadays. If they show out-of-stock - sign up on this page to be notified when they're back.
This is your basic 1-Quart Wide-Mouth Mason Jar (there is no Screen included). Probably the best known method of sprouting is Jars with Screen Lids. Though Jar sprouting generally requires more attention to detail - it certainly can work! Jars are clear and very cleanable, because they are glass. If you want to sprout in Jars, you'll also need a Screen Lid or three - to top your Jar.
Jar Sprouting Instructions
Specific Sprouting Instructions are found on the page devoted to the Seed or Mix you are growing. Below are the specifics of Jar Sprouting. All steps take for granted that you have a Screen Lid attached to your Jar.
Seed Prep
Not all seeds require this step. See the seed information page to see if you need to do this for the seed you are sprouting. Skip this step if you don't have a screen with mesh smaller than your seeds.
Fill the Jar with water. Twirl and twirl and twirl the water around in the Jar. Pour water out and repeat the fill and twirl and pour until the water runs clear.
Soaking
Fill your Jar with cool (60 - 70°) water unless instructed otherwise by your seed supplier (us, we hope =;-) and leave to soak for 8 - 12 hours, or for the time noted for the specific seed/mix you are sprouting.
Rinsing
Fill your Jar with cool (60 - 70°) water. Twirl and twirl the Jar. Pour water off and repeat once or twice more. As a rule we do it 2-3 times every time we Rinse. We Rinse and Drain 2-3 times daily.
Draining
This is the hardest part of Jar sprouting. It is also the best reason to have screw on Screen Lids. When you are done Rinsing you need to get as much of the water out of the Jar as possible. With a Jar all you can really do is use gravity, so turn it Screen down and shake it up and down over and over and over again until no more water comes out through the Screen. When you are growing big seeds it is easy enough to get most of the water out, but when they are small seeds, there will always be some water left, so shake more than you think is necessary.
Sprouting
We always put our Jars face down - at an angle - 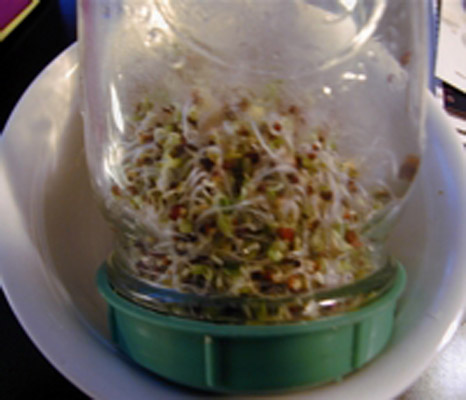 between Rinsing
and Draining. We will use our dish rack in the rare event that it isn't full of dishes, or more often, we use high rimmed bowls which the Jar rests on, and which captures the excess water that inevitably drains out, even after our
thorough Draining. You can get away with leaving the Jar upright if you are growing big seeds (see Perfect, above), but when you grow small seeds (those listed above as Good Matches) they end up
sitting in water (that water which we can't believe is even there, because we drained so thoroughly after Rinsing). Actually it is only the very bottom seeds/sprouts that are sitting in water, but they don't much
like it and they can spoil your whole crop. So, set the Jar - at an angle - face down between Rinsing and Draining! It can also improve air-circulation
(not if you use a bowl as pictured, but certainly if you use the dish drainer or something open like that).
between Rinsing
and Draining. We will use our dish rack in the rare event that it isn't full of dishes, or more often, we use high rimmed bowls which the Jar rests on, and which captures the excess water that inevitably drains out, even after our
thorough Draining. You can get away with leaving the Jar upright if you are growing big seeds (see Perfect, above), but when you grow small seeds (those listed above as Good Matches) they end up
sitting in water (that water which we can't believe is even there, because we drained so thoroughly after Rinsing). Actually it is only the very bottom seeds/sprouts that are sitting in water, but they don't much
like it and they can spoil your whole crop. So, set the Jar - at an angle - face down between Rinsing and Draining! It can also improve air-circulation
(not if you use a bowl as pictured, but certainly if you use the dish drainer or something open like that).
If you have our Screen Lid Set - or another set of Screens, of various mesh sizes - change your Screen as your sprouts grow, unless you started with the widest mesh Screen, of course. When growing seeds that shed their hulls, especially small seeds like Leafy Sprouts and Brassicas - which grow leaves; moving to a wider mesh screen allows hulls to escape when you Rinse and Drain. Always use the widest mesh screen you can - regardless of what crop you are growing. As long as your seeds/sprouts aren't escaping - you're using the right screen. The wider mesh also makes Draining easier, and slightly improves air-circulation.
Greening
We always suggest a low-light, 70° location for your sprouter, until it is time for Greening (if you are growing sprouts that green (anything that grows a leaf - like Leafy or Brassica sprouts). At that point we often say: Move your sprouter to a brighter location (or words to that affect), and though we always say to avoid direct sunlight, we will tell you strongly: Never put a Jar in direct sunlight - unless you wish to cook your sprouts! The lack of air-circulation built into Jars makes them the most vulnerable to heat build-up, so if you are Greening sprouts in a jar, don't move them to a too bright a location, but rather, concentrate on that other thing we say: You'll be amazed at how little light it takes to turn your sprouts green!
Harvest and Crop Storage
Before Harvesting any crop, it is essential that you Drain it Very Thoroughly after your final Rinse. Storing crops that are dry to the touch, maximizes their shelf life. Draining, when growing in a Jar is always a bit more work, so pay especially close attention to this. Drain thoroughly! If you are growing Leafy or Brassica sprouts, you can use our De-Huller to remove any remaining hulls, and dry your crop at Harvest time.
If you want to Store Your Crop using a Jar, all you need is to screw a Solid Lid onto your Jar, before putting it in your refrigerator.
Seed Specific Sprouting Instructions
If you have a particular seed type in mind, read on to discover further details of Jar Sprouting that seed type. Refer to the seed's main information page for detailed instructions.
Beans
Follow instructions on this page for Jar specifics and on the seed/mix detail page for all bean specifics.
Maximum dry seed per Quart = 1.5 cups
Mung Bean
You can't grow big thick Mungs in a Jar unless you want to break the Jar when they're done - that's the only way you'll get the sprouts out. SO, grow the sweet and tiny Mungs when using a Jar!
Maximum dry seed per Quart = 1.5 cups
Brassicas
Broccoli, Radish, Cabbage, etc. need to move while sprouting or they will form a root mass (beginning around day 3) which is at least unpleasant and often lessens the sprouts' quality. Solution: Break Up/Loosen the mass. Fill the Jar with water, take a fork and use it to loosen the sprout mass. If the Jar is too full, transfer them to a bigger container for the loosening. Keep breaking up the mass at every Rinse after that too.
You will also get rid of hulls by changing your Screen Lid as your sprouts grow. Use the widest mesh you can. Always. As long as your sprouts aren't falling through the Screen, you're using the right Screen.
Do not try to grow mucilaginous seeds in a Jar!
Maximum dry seed per Quart = 3 Tablespoons
Leafy Sprouts
One issue folks have with these sprouts is that they expect them to be green. There are - almost always - regardless of the sprouting method - some sprouts which will not turn green. Those that grow in the center of the crop - their leaves will remain yellow. Our advice is: Live with it! Most will green if you don't over-crowd the sprouter (use 2 Tbs. or less of seed) - and those that don't are still plenty delicious, nutritious and they add beauty (yellow goes well with green and white!) too. Leafy sprouts will shed their hulls more readily if they are allowed to move freely, so break up the mass on day 4 and 5 and maybe 6. Fill the Jar with water and kinda pull the mass apart with a fork type implement. It isn't a critical issue with the Leafy Sprouts, but it doesn't hurt.
You will also get rid of hulls by changing your Screen Lid as your sprouts grow. Use the widest mesh you can. Always. As long as your sprouts aren't falling through the Screen, you're using the right Screen.
Maximum dry seed per Quart = 2 Tablespoons
Exotics
Garlic, Onion , Fenugreek, etc. require no extra work - though they do take more time. Be sure to drain the Jar well after each Rinse so that the seeds/sprouts aren't sitting in water (not only will those that sit in water sprout poorly - they'll smell REALLY bad!) and remember - Alliums all take up to 2 weeks to finish sprouting so keep Rinsing and Draining if it's Alliums you be growing.
Maximum dry seed per Quart = See the detailed page for the Seed or Mix you are growing.
Grains
Follow Seed specific AND Jar specific instructions.
Maximum dry seed per Quart = 1.75 cups
Nuts and Seeds
Follow Seed specific and Jar specific instructions.
Maximum dry seed per Quart = 1.5 cups
Seeds and Pseudograins
Follow Seed specific and Jar specific instructions.
Maximum dry seed per Quart = 1.5 cups
Critter Sprouts
Follow Mix specific and Jar specific instructions.
Maximum dry seed per Quart = 1.5 cups
Grass and Greens
Pre-Sprouting Only! Fill your Jar all the way, with water, when Soaking Sunflower Greens. Use a Screen Lid too, to keep them under water.
Maximum dry seed per Quart = 1.5 cups
Micro-Greens
Pre-Sprouting only! Never mucilaginous seeds!
Maximum dry seed per Quart = See Seed Information page for the seed or mix you are Pre-Sprouting.
From here on down, all of our Jar and Lid pages are identical. We like to make our information easy to find @:-)
Jars
We have Wide-Mouth Mason Jars: 1 Quart and 1/2 Gallon (2 Quarts)
Screen Lids
 For the dedicated Jar Sproutperson, our 3-Screen Sprouting Lid Set is perfect. It completes a Jar. Or three!
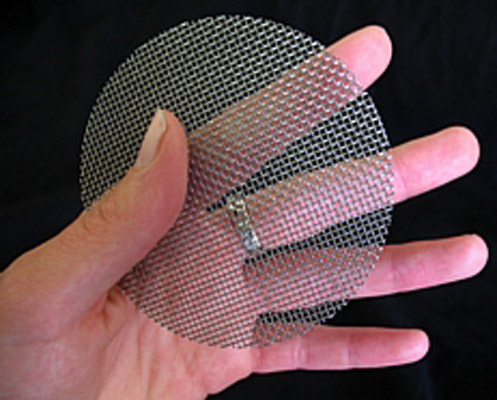
Sprouting Screens come in different mesh sizes. You should always use the widest (coarsest) mesh you can. Wider mesh allows the water to flow in and out more easily and improves air-circulation as well. In some cases (when growing Leafy or Brassicas sprouts) you change the screen lids (from fine to medium and then to coarse) as your sprouts grow. The widest mesh screen allows some hulls to pour out along with water during your last few Rinse and Drain cycles. This makes de-hulling easier.
You can grow all the way with a narrow mesh screen - though your hulls won't pour off and air won't move quite as well, they still work great. But......
Sproutpeople has improved on the old Sprouting Screens!
14 years into our sprout adventure we began producing our own Set of 3 Stainless Steel Screen Lids. They are made from T304 standard grade Stainless Steel. They come in 3 mesh sizes: Fine, Medium and Coarse. And perhaps best of all, our Fine mesh lid is finer than any lid ever offered (in this galaxy anyway), so even the smallest seeds won't escape (except Teff, but that is almost microscopic).
 The Screens are held on your Jar with heavy duty Plastic Rings.
Our bright white Plastic Rings are very durable. We have these made just for Sproutpeople. They are expensive, but worth it. Plastic Rings are the ultimate solution to rust.
Metal Rings rust over time and can cause the outer portion of your screens to rust too. You can discourage rust by coating Metal Rings with a light coating of vegetable oil or some food-grade silicon spray if you like, but rust is inevitable. Due to that - and supply issues, we only sell Metal Rings individually.
Our 3-Screen Sprouting Lid Set comes with Plastic Rings. It is, if we do say so ourselves; the ultimate solution for Jar sprouting.
We also offer an Individual Sprouting Screen (with the same Plastic Ring). That screen is our Medium Mesh.
Lastly, if you want to store crops in Jars, we offer a Solid Plastic Cap, which of course, fits Wide-Mouth Mason Jars.
Though you can make your own "screen" lid - with cheesecloth, hardware cloth, a nylon stocking and a rubber band or string, we strongly advise that you use actual screw on Screen Lids. They make the Jar as good as it can be, and because Jars require extra work (Compared to other Sprouters, they have relatively poor air-circulation and draining is generally more difficult), we think you will be very well served by adding these fairly inexpensive attachments. But, we do love the pioneering spirit, so go for it. We made our own, once upon a time; we used nylon stockings and rubber bands, during our first 2 weeks as Sproutpeople - in May of 1993. We found the stockings made draining very difficult, but then again, we were growing 50 jars at a time. You may find a homemade screen works just fine for you. It never hurts to try.
Growing Capacity: 1 Quart or 2 Quarts
Per Quart you can grow: Up to 1 pound of Leafy Sprouts or 2 pounds of Bean or Grain Sprouts.
For Sprouting Instructions, click the name of the Seed or Mix you want to grow.
FOR USE WITH THESE SEEDS/CROPS
Seeds to Sprout In a Jar
Jars can be used to Sprout or Pre-Sprout just about any seed. The seeds that don't belong in a Jar, are those that are mucilaginous.
These seeds are a Perfect match for the Jar:
Beans - All (see Mung Note below)
Mung Beans - Jars should be used only to grow small (1/8-1/4 inch) Mung Sprouts - which they do quite nicely! The 3 big issues with growing big thick Mungs in Jars are the inability to keep them dark while growing, the inability to apply weight to the growing sprouts and the almost impossible task of removing the sprouts when they're done. Don't even try big thick Mungs. You may very well succeed, but if you do you will have to break the Jar to remove the glorious sprouts.
Grains - All
Nuts and Seeds - Almonds and Peanuts - The big ones.
A Good Match for the Jar: These seeds can all sprout wonderfully in a Jar if you pay extra attention to the details of sprouting.
Leafy Sprouts - Alfalfa, Clover and Mixes - All
Brassicas - Broccoli, Radish, Cabbage, Kale, Tatsoi.
Exotics - Garlic, Onion, Fenugreek, Hot + Sweet, Clem's Choice, etc.
Seeds and Pseudograins - Buckwheat Groats, Quinoa, Amaranth, Sesame, Pumpkins, Sunflower - the smaller and tender ones.
Pre-SproutPerfection:
Jars with Screen Lids are a great Pre-Sprouter for these items, but can not grow these crops to completion: Grass, Greens and Non-Mucilaginous Micro-Greens
Almost a necessity for Sunflower Greens, because they float when soaking.
Jar & Lid Assembly
Put Screen inside Ring. Screw Ring on Jar.
That's about it, but let me go on.......
All of our Screen Lids will fit any Wide-Mouth Mason Jar - which are the only Jars we sell.
Notes
Cleaning: Scrub well between crops with soap and water. Rinse well!
Sterilize: Soap and water are usually all you need for Jars and Screen Lids. You can use food grade hydrogen peroxide - it is better for you and the environment than bleach, which is what we used in our day as professional growers. We might even offer something for sterilizing.
I use these on pint glass jars to get my medium and large sized dals sprouting, then I transfer them up to a quart sized mason jar and the screen lids and plastic ring still fit.
So easy, so versatile. Fabulous!
I use these on pint glass jars to get my medium and large sized dals sprouting, then I transfer them up to a quart sized mason jar and the screen lids and plastic ring still fit.
So easy, so versatile. Fabulous!
I absolutely love these sprouting jars and the 3 different sized screen lids, they are simple to use and convenient. I started using them a couple of years ago as a first time sprouter. Thanks sprout people!
I absolutely love these sprouting jars and the 3 different sized screen lids, they are simple to use and convenient. I started using them a couple of years ago as a first time sprouter. Thanks sprout people!
