
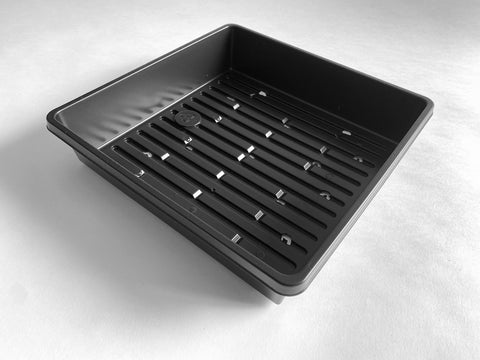
Tray - 10x10 Planting OR Cover
This 10 inch square Tray has Drainage Slits. It is great for good sized crops of Greens, Grass, and Micro-Greens. We use it as both a Planting Tray and a Cover Tray. Two of these Trays DO NOT fit into one 10x20 Drip Tray, they are just a little too large. Please take note.
The narrow drainage slits in this Tray are perfect for any Growing Medium - and when used as a cover - for air-circulation.
All of our Trays are intended for growing Grass and Micro-Greens.
Please note that we changed to a new manufacturer in 2022. These are not interchangable with our previous 10x10 or 10x20 Trays. All of our black Trays are #6 plastic.
Nursery Tray Growing Instructions
Specific Sprouting Instructions are found on the page devoted to the Seed or Mix you are growing.
Below are Tray specific Instructions for growing Micro-Greens and Grass, using a medium.
Plant in a Tray WITH drainage holes/slits.
Seed Prep, Soaking, and Pre-Sprouting
These tasks will require a Sprouter or a little imagination.
Planting
There isn't a huge difference in procedure when growing on different mediums, but we spell them out where they exist. In the instructions that follow, we specify Hemp Felt and Coconut Coir. We may have, or add new products in time, so here's the deal: If you are using a PAD type medium; follow the instructions labeled Hemp Felt. If you are using SOIL (any bagged sterile soil-like product will do) or a SOIL-LIKE medium; follow the Coconut Coir instructions.
Preparing to Plant
Coconut Coir: Fill Tray 2/3 - 3/4 full. The reality is this: As your plants grow they want more and more water. They get their water from the medium. The deeper it is - the more water it can hold = the less you need to water as the crop grows.
Thoroughly moisten the Coir. The goal is for it to be thoroughly saturated, but without puddles. As long as water runs through it freely you're doing it right.
Hemp Felt: Cut the pad to fit your Tray (if necessary). Soak it in water or better yet, Kelp Fertilizer enriched water (FYI - We dilute our kelp - 1 teaspoon per quart of water - which is stronger than the bottle says), until thoroughly saturated. Spread the wet pad across the bottom of your Planting Tray.
Planting
Spread seeds (sprouts if your crop required pre-sprouting) evenly (relatively) on top of your thoroughly moistened medium. The seeds will take up moisture from it, though if you are growing on Hemp Felt, do mist them with a spray bottle to give them more water to soak up.
Cover the planted tray with an inverted tray - to keep light out, and moisture in.
Note: It's preferable for your Cover Tray to have holes or slits in it so that more air circulation happens.
COME HERE, PLEASE. Once you have arrived, click the name of the crop. There you will find, 2 sets of instructions (brief and detailed), photos of the crop day-by-day, a how-to video (in most cases), and more.
Growing
Watering
Most seeds will not mind you misting them lightly with a Spray Bottle once or twice a day - but some will hate it. Know your seeds. If your crop has been PRESPROUTED - either mist or use the sprayer on your sink. Keep the sprouts moist until they bury their roots in the medium. Be gentle - we want to keep the sprouts in place so they can bury their roots. When the roots are buried our focus shifts to keeping the medium moist.
As our plants grow they consume more and more water. Of course, different crops have different needs, but in general - keep the medium moist but not soggy.
Hemp Felt - gentle when watering, during the first few days, because it is easier for the seeds/sprouts to move around on this relatively smooth medium.. We water our Hemp Felt crops with a Spray Bottle (with Kelp Fertilizer enriched water). The Spray Bottle is the height of gentle, so it's perfect for watering seeds and very young sprouts. Also - Hemp Felt will dry out more quickly than soil in most circumstances, so pay attention to it. Keep it moist. The Sprayer is your friend.For Everyone: Water the seeds gently for the first day or three. You want them to stay in place once planted on the medium, to allow the roots to bury themselves. When the roots are firmly in the medium, you water the medium every day or two. Your plants will take up their water from the medium. Keep the medium moist but not water logged. Your plants will need more water, more often, the bigger they get.
Alternate Watering Method You may want to experiment with our somewhat risky trick:
Use the Drip Tray to hold some water. The roots will actually sit in this, so don't go crazy - too much can drown your plants and/or lead to fungal or mold problems. Just leave as much water as the plants can drink in a day - and then add more the following day. The amount is dependent on the climate (humidity especially) you're growing in, so you'll have to learn this for yourself. We suggest that you start with 1 cup in the Drip Tray. Lift the Planting Tray to see how much is left after 4, 8 and 12 hours. If the Drip Tray is dry, add more water - if there is still water 24 hours later, then cut back the next time you add water. Pretty simple really, and not as risky as we make it sound - it is really a time saver and in our home, produces happy healthy plants. During your regular spraying some water will run through and collect in the Drip Tray. Be sure to account for this too when calculating how much to add to the Drip Tray.
Once again, we do recommend Kelp Fertilizer enriched water for soilless growers. Soil growers may use it too of course, but the soil does have some nutrients already, so it is not nearly as important for you. Just follow the instructions for diluting, on the Kelp Fertilizer bottle (though we use 1 tsp per quart of water).
Greening
Keep Trays covered until the Instructions on the Seed Page say to uncover. It's too crop specific to generalize here.
You can get to those pages via our Seeds Page, or these Category Pages -
Grass
Microgreens
When you do Remove the Cover Tray...
Locate your crop where they can get some light.
Since you are dealing with Trays you can get away with more light than when using enclosed sprouters. You can even use direct sunlight, but do pay attention, as the sun hastens
drying and heats up the plants, so you might have to water more frequently. Experiment and see. We love Greening our
plants outside in the sun! We cover them with screen or garden fabric, or a thin white sheet - to keep 4-legged critters, insects and birds away. You do not need sunlight.
You'll do fine with minimal light too, so don't feel like you have to push it.
Harvest
All of these plants, regardless of what medium they are grown upon, are harvested by cutting just above that medium - with a scissors, or a very sharp knife. As with all crops, if you are going to refrigerate your crop, it should be not wet (wet plants will decompose in refrigeration much faster), so allow them to dry before refrigerating. We sell really great Produce Storage Bags, that actually extend the shelf life of produce by allowing ethylene gas to escape. You don't need those if you're going to eat your crop in short order - which is of course, when they are at their finest. Whatever you are happy storing your crops in is fine, and fine with us.
Regardless of what medium you planted on - you can not plant on it again. Growing mediums are NOT re-usable. Compost it!
If you grew on Hemp Felt, you need to be careful when removing it from the tray. Cut the roots that are growing out of the bottom first, then carefully pull it up from a corner. If you are too casual, you can break your tray, so take your time.
Though you can't re-use your medium - you may want to try growing a second crop. To do this; just keep the medium moist. Re-cover your Growing Tray until the plants grow an inch or two, and proceed as above. No subsequent crop will ever be as good as the first, but it doesn't hurt to try. See the seed's detail page for more information.
Please Note that all of our Tray pages have the same text below this point. We love when folks read our stuff, but we thought we should warn you....
Between 1993 - 2003, Sproutpeople produced over 200 tons of sprouts, plus tens of thousands of trays of both Grass and Microgreens, using Trays like these. Before I proceed, I have to warn you that our pages refer to these in various ways, due to my unwillingness to settle on one alone. When we were new to sprouting, we were told these were called Flats. If you buy plants at a Greenhouse or Nursery - and you buy them by the Tray - that is still commonly referred to as a Flat of plants. The other word that enters in is Nursery, because a Greenhouse is also known as a Plant Nursery - so sometimes I refer to these Trays as Flats, or Nursery Flats, or Nursery Trays. It's all the same thing; a Tray by any other name... @:-)
There is little need for a home grower to grow such large amounts of Sprouts, that Nursery Trays would make sense - though we will someday be adding information here on our site - or in a book, which will detail methods of growing sprouts in these, and in buckets - for small wholesale and farmer's market growers. For now, these Trays are not a good choice for sprouts because their drainage slits/holes are poorly laid out.
Nursery Trays are designed for growing Grass and Micro-Greens.
When growing in Trays, you also need a medium, to plant upon.
We offer two Mediums:
Coconut Coir is made of coconut husks and is soil like.
Hemp Felt is a thin felt like pad made from hemp.
There are so many mediums available in the world. Many will do quite nicely and should be locally available, but they may have unique traits that will alter how they perform. We have grown Grass and Micro-Greens - on soil - in Trays, for many years. Now we have alternatives: Soilless Planting mediums - Hemp Felt and our favorite, Coconut Coir. We also have liquid Kelp Fertilizer, to help you and your crops, when growing without soil. Hemp Felt is a thin organic material that holds moisture quite well. It is excellent for Micro-Greens. Coconut Coiris is made from the outer shell of coconuts. It is a medium that has remarkable moisture retention, and provides nutients as plants grow. We mix in Earthworm Castings - 25% (by volume), to create an ideal medium for growing. We think you should try these mediums, to discover what you prefer working with. You should use Kelp Fertilizer too, if you grow soilless - it can make a whole lot of difference.
If you want to stick with soil: You can use any bagged soil you like for most crops. We used sterile bagged composted cow manure for all of our Grass and Greens. It provided the extra nitrogen those plants like. We add even more nitrogen - mixing into our soil about 25% Earthworm Castings - when growing Sunflower Greens. You can use any sterile soil you like. Though expensive soils are fine, we prefer inexpensive. Whatever you choose - be sure it is free of chemicals!
Each 10x20 inch tray will grow 1-3 pounds of Greens or produce enough Grass to yield 10-20 ounces of Juice! Use your math skills if you are using a smaller Tray @:=)
Nursery Tray Sets - Assembly
Our 1/2 Crop Tray Set is singular. Its footprint is only 10x10 inches! Now we can grow So Much More in our not-big kitchen! Use the 10x10 Drip Tray as a base to catch any water that escapes your 10x10 Growing Tray - and top your Growing Tray with another 10x10 Cover.
All of our other sets contain one 10x20 inch Drip Tray which is the Container for the tray(s) in which you plant. It keeps water +/or mud from messing up your home.
Single Crop Tray Set Planting is done in the Heavy Duty Tray with circular drainage holes. The Lighter weight Tray with drainage slits, is a 10x20 inch Cover Tray - to cover your planted tray.
Two Crop Tray Set Planting is done in two of the 10 Inch Square Trays. The other two are your Covering Trays.
Crop-a-Day/8 Crop Tray Set Planting is done in eight of the 5 Inch Square Trays. The other eight are your Covering Trays.
If you are growing indoors, you must use a solid Drip Tray as the base - it is just like keeping a plate under a houseplant. If you are growing outside you can safely skip the Drip Tray, though you should use one, if you are growing on Hemp Felt.
Cleaning: Scrub well between crops with soap and water. Rinse well!
Sterilize: Soak and scrub with a disinfectant as often as required. If your crop fails, it can be due to not having a sterile tray. Soap and water usually do the trick, but if not - use any disinfectant you are comfortable with. In our day, we used bleach water, but we dislike the toxicity of bleach, so we seldom use it, unless absolutely necessary. It is always true that; A clean sprouter produces the best crops.
