Basil Micro-Greens

A unique (mucilaginous) seed, Basil forms a sack around each seed when it comes into contact with moisture. We sell Sweet Basil. Basil is a difficult Micro-Green to grow, but done properly it tastes wonderful and can even yield additional cuttings.

Our Basil comes from a source which is certified organic.

Note: We sell Basil by the 1/2 pound.

$24.42 / 1/2 lb.
In stock
Max allowed quantity 10

FREE Shipping on domestic orders $120+

Print Instructions

Plant 1-2 teaspoons of seed (for a 5x5 inch Tray) on thoroughly moistened medium.

No need to cover. Light helps Basil Germinate!

Keep your medium moist by watering lightly as needed. Don't drench!
Use Coconut Coir and you probably won't have to water at all after planting!

Harvest when the leaves are open and an inch or two tall (day 14-21).

Cut just above the medium, with a scissors or sharp knife.

Print Instructions

Yields approximately three times as many Micro-Greens (by weight) as seed "planted"
We put quotes around Planted because the seeds are spread atop a medium - not planted under.

Planting

PLEASE read the contents of Notes Tab (to the right)
for variations and a whole lot more information.

Grow these on the ultimate medium -
Coconut Coir, soil, or a soilless medium like Hemp Felt, in a Compostable Tray - or for bigger crops you can use a 10x20 Tray, or another of our Growing Trays.
Or - grow them upon a flat Hemp Bag, or in our gorgeous Euro-Sprouter.

I know - too many choices. That's our biggest problem here at Sproutpeople. Choices!
So I'm going to tell you the way I (who have every possible option available) grow Micros.
I always use Coconut Coir!
I mix Earthworm Castings into my Coconut Coir for added nitrogen (which is very good for green plant growth), at a rate of 25% Castings to 75% Coconut Coir.
I grow in our Compostable Tray if I am going for Cotyledons (the first leaves), or
a 5x5 Nursery Tray if I want True Leaves.
The Nursery Tray is deeper - which gives the roots more room to grow - so the plants can grow bigger more easily.

Thoroughly moisten the Medium upon which you are going to grow.

Measure your seed
For a thick crop of Cotyledon (first leaf) Micro-Greens plant the larger amount. For bigger, True Leaf Micros plant the smaller amount.
Stainless Steel Sprouter = 1 - 2 Tbs.
small Stainless Steel Sprouter = 1/2 - 1 Tbs.
Compostable Tray = 1 tsp. - 2 tsp.
5x5 Nursery Tray = 1 tsp. - 2 tsp.
10x10 Tray = 1 - 2 Tbs.
10x20 Tray = 2 - 4 Tbs.
Hemp Bag = 2 - 4 tsp.
Euro-Sprouter = 1 - 2 tsp.
If you are going for True Leaves you really must use a Growing Tray that is at least 2 inches deep - like our 5x5, 10x10, or 10x20 inch Nursery Trays.

Spread seeds as evenly as you can - all over your thoroughly moistened Medium.

Do Not Cover your crop, unless you have a clear cover. Basil will actually germinate more quickly (a day or so sooner) in the light.

Place your Micro-Garden in a lighted, room temperature location (70° is optimal).

Growing and Greening

You are working with mucilaginous seeds. Every seed will take up water from the thoroughly moistened medium and will surround itself with a gel sack. That sack has all the water the seed needs to germinate. You won't need to water again until germination begins.

Once germination takes place - keep the medium moist by watering gently or misting with a Spray Bottle every day or three. The deal with watering is that the deeper your medium, the less you need to water, and the plants won't require a lot of water until they get growing big - at which point you may need to drench the medium every day.
When using our Compostable Tray (which has no drainage) you can pour off excess water by tipping it.

Note: These amazing little plants have a unique root structure. They may show microscopic roots starting a couple days after they germinate. They are called root hairs and are most visible just before watering - when the plants are at their driest. These root hairs impress many people as mold - but they are not. When you water your crop the root hairs collapse back against the tap root. Viola! No root hairs! Now you know. Isn't learning fun?!

If you are going for True Leaves you should definitely use sunlight in a warm place.
The most beautiful Micro-Greens we have ever seen were grown in a greenhouse in Burlington, Vermont (in summer) by our friends Spencer and Mara at Half-Pint Farm. Just had to mention that. They taught me and Lori a lot!

Keep the medium moist by watering regularly. Water from the side if possible to prevent injuring the tiny plants.

When your plants have open leaves which are green, they are done - unless you're going for True Leaves, in which case you need to keep watering and tending for another week or more.

Harvest

Cut the plants just above the medium upon which they have grown. During the final 8-12 hours minimize the surface moisture of your plants - they will store best in your refrigerator if they are dry to the touch. So if you water try to keep the water off the plants - just water the medium.

When you are ready to store them (I'll remind you that these degrade fairly quickly, so eat them instead of storing them if you can), if they are still damp - lay them between some paper towels or anything you prefer, and dry them very gently. Transfer your crop to a plastic bag or the sealed container of your choice - glass is good. We sell an amazing Produce Storage Bag that actually extends the shelf life of produce, if you're interested in the best of the best =;-) Whatever you store them in; put them in your refrigerator - if you must.

Great Job Sprout farmer!

The shiny little seeds

Basil spread atop the thoroughly moistened medium - Coconut Coir.

30 minutes (or less) later... You can see the gel sacks beginning to form.

2 hours later... This is like the definition of mucilaginous, of Gel Sack.

24 hours later....

24 hours later.... Germination!

24 hours later....

24 hours later....

24 hours later....

24 hours later....

24 hours later....

24 hours later....

24 hours later....

24 hours later... Harvest now - or go over the Notes Section (over there - to the right) and take your education, and your Basil, further.

Basil has been a seed we have wanted to use for many years. It was one of the first crops we grew when we began gardening in the 80's and as it tasted just like Basil when I was thinning our garden, it seemed like a great choice for a Micro-Green. Alas I found this extremely difficult to get flavor out of. I could get it to grow, but the Micros just had little flavor. I am a persistent guy though and eventually I found that it makes a huge difference what medium Basil is planted on. I get great crops and all the Basil flavor when growing on Coconut Coir. Though you can use other mediums - we do not recommend it. Coconut Coir is amazing stuff! I now plant everything on it and I get better crops than ever - especially when I mix in 20% Earthworm Castings.

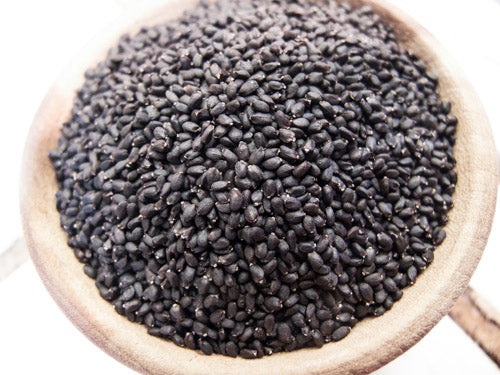
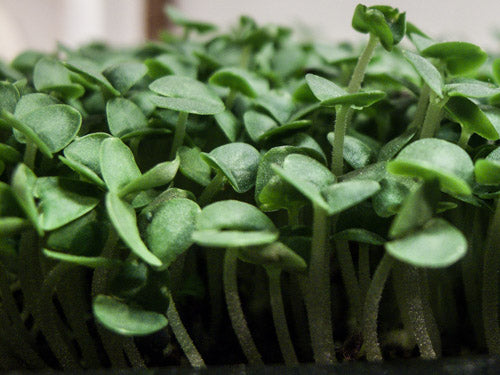
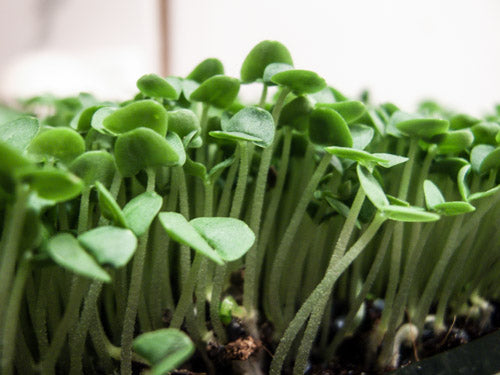
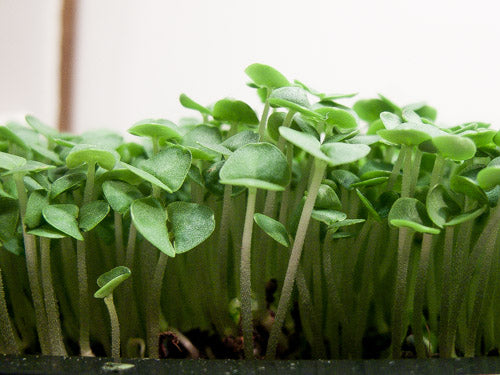
This is an amazingly vigorous seed. These do grow short micros, like all basil, but they are lush, tender and tasty!

Seed Shelf Life: 3 years. Store in cool, dark, dry spot.
Store in freezer to extend shelf life.


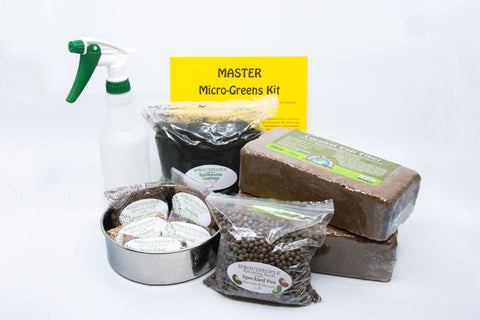
Sproutpeople and Micro-Greens

We first grew Micro-Greens back in 1994. We were way ahead of the curve. Nobody was interested in them - not our farmers market customers, not our food stores (co-ops, natural food stores and grocery stores we delivered to every week), not our restaurants, nobody! That did change some as the years passed, but we were always Sprout People first. Frankly, we prefer Sprouts to Micros because we find them plumper and more texturally pleasing -  
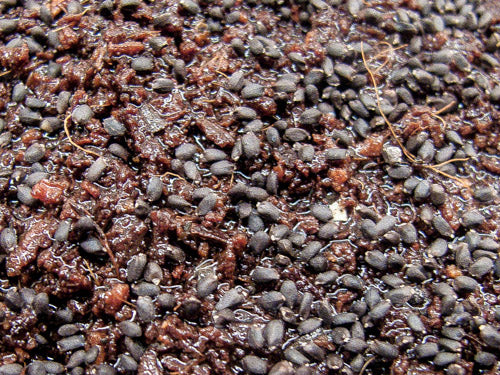
but we keep working with them.  Some seeds (especially mucilaginous seeds)  won't grow as sprouts and Micro-Greens are SO gorgeous and offer a lot of unique and really cool possibilities.

Soaking and Pre-Sprouting

Though our instructions (in the Growing Instructions Tab - to the left) used to suggest these steps (for non-mucilaginous seeds), we have found them less and less necessary as we've worked with Micro-Greens. 
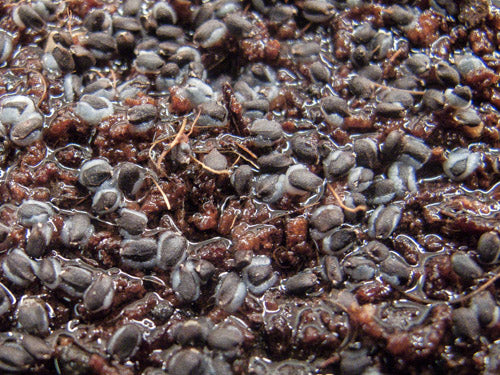
We skip both now, concentrating first on thoroughly moistening 
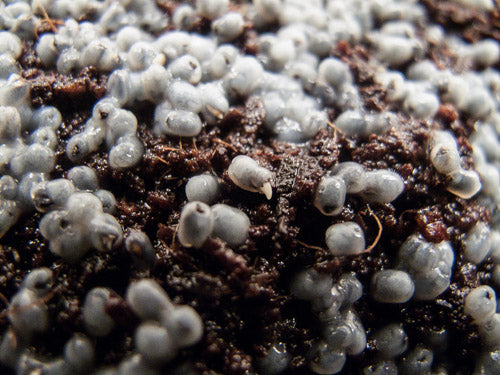
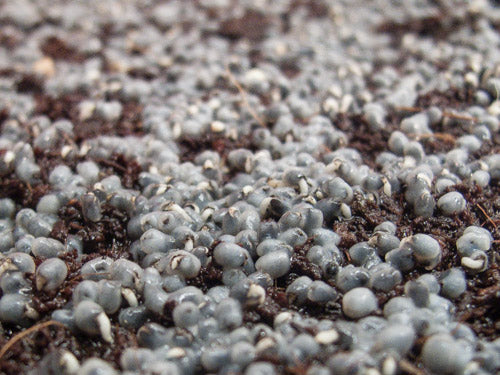
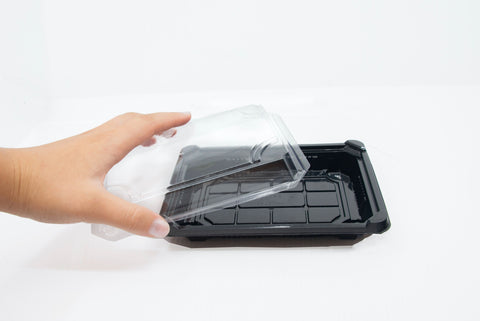
our medium.  We then plant the seeds (which are just spread atop that thoroughly moistened medium),  and mist them with a Spray Bottle, when appropriate.  We then cover our planted seeds.  
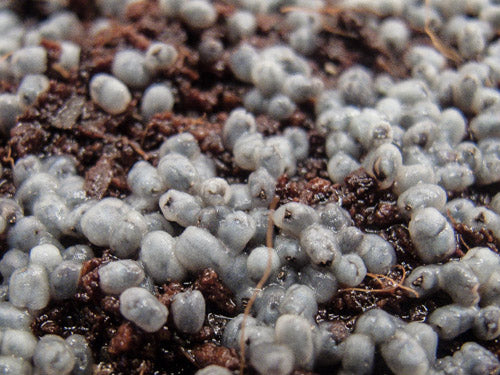
We mist them with a Spray Bottle at least once a day until they sprout, and then bury their roots  in the medium.  During those first 2-3 days we are misting heavily for some - - not at all for others. We uncover the crops at different stages, depending on what we are doing with a particular crop.  Keep reading to learn more.

Fertilizing Micro-Greens

When growing on a soilless medium like Hemp Felt - it is advisable to use Liquid Kelp Feritlizer to give your plants  additional nutrients to draw upon.  When we use Kelp we dilute 1 tsp. in 1 quart of water (this is a higher concentration than the product label calls for).  We use it in a Spray Bottle or by watering the medium directly.  We use it every time we water.  
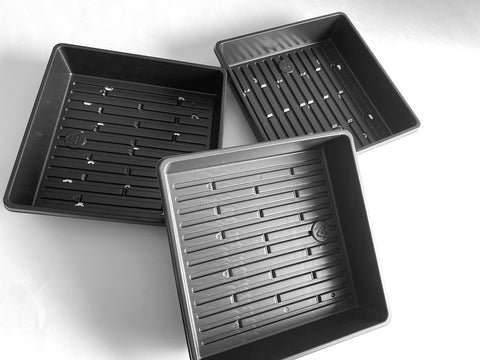
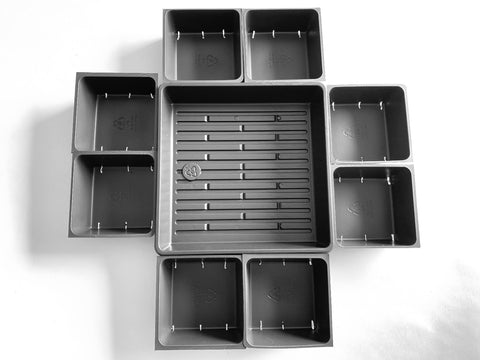
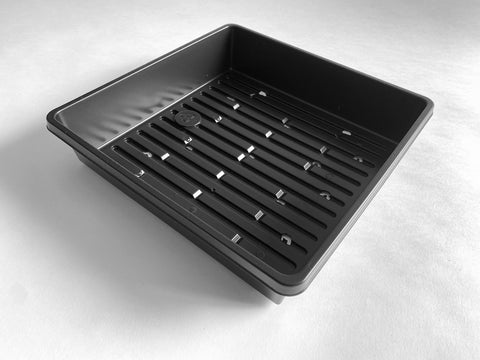
The perfect container for these soilless mediums is our inexpensive Compostable Tray. If you plant on soil - or better yet with Coconut Coir (our FAVorite), mix in 25% Earthworm Castings  for the ultimate nutrient rich, moisture retaining planting medium.  Mix them together thoroughly before moistening.

Micro-Green Variations

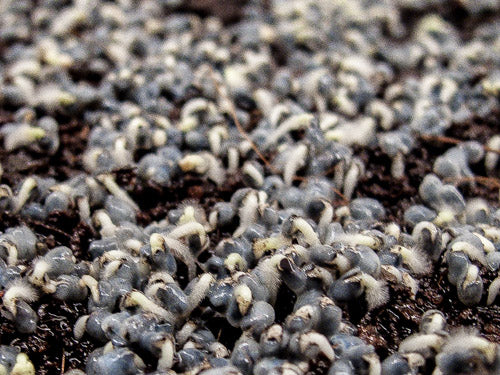
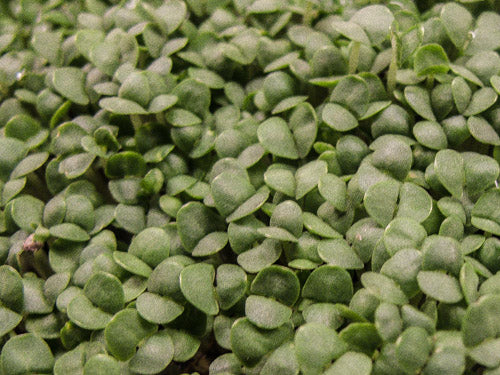
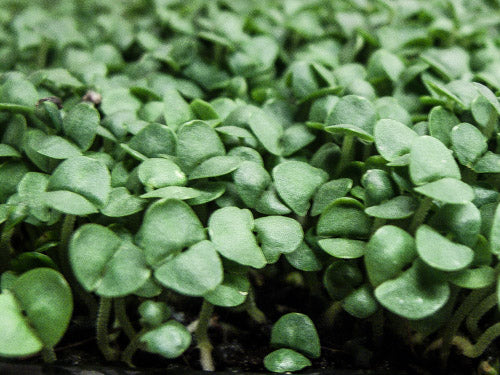
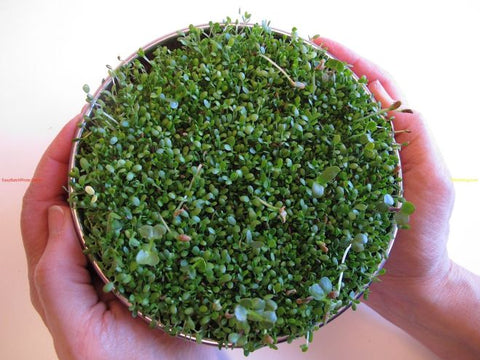
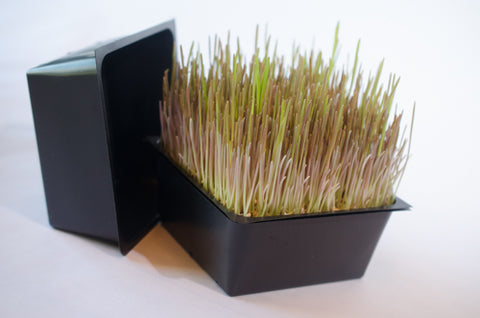
There are varying opinions of what constitutes a Micro-Green.  Traditionally it is just a plant grown to the Cotyledon (first leaf) stage, and cut above the medium upon which it is planted. 
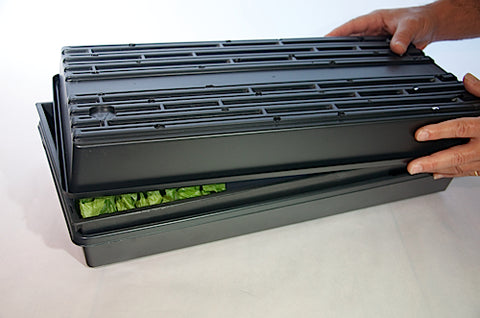
When we grow to this stage; we either grow on Hemp Felt, soil (any kind will do) , or our favorite -  Coconut Coir.  Hemp Felt is less messy and works fine and dandy.  We cut a piece to fit a  plate, then  we follow our own instructions for keeping the medium and seeds-sprouts thoroughly moist.  We use another of the same size plate - inverted - as a cover.  We uncover our plants when they are about 1/2 inch tall, or when they are hitting the covering plate.   We then expose them to all the light our kitchen has to offer.  We even use direct sunlight when available.  We have to water them more often when we do this.  When it comes to watering, We mist them with a Spray Bottle until the seeds have firmly rooted.  After that -  when growing on a piece of  Hemp Felt on a plate; pour water directly onto the plate.  We gently tip and turn the plate so as much water as possible gets soaked up by the Hemp Felt, and then pour off most of the excess. When growing on soil or  Coconut Coir; we continue to spray with the Spray Bottle, but we keep the medium moist by adding water directly to the plate or solid tray it is sitting on/in.   We allow the medium to drink up what water it can, and then gently pour off the excess.  Leaving a little water on the plate is fine - it will get sucked up before your next watering.  If it doesn't, cut back a bit next time.

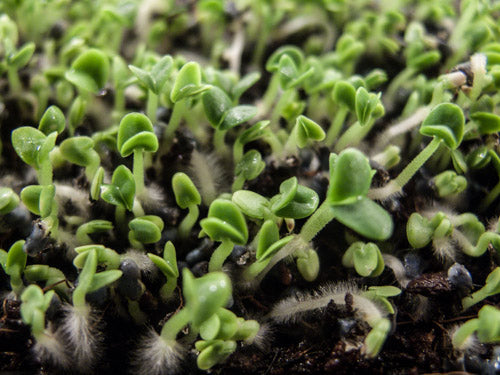
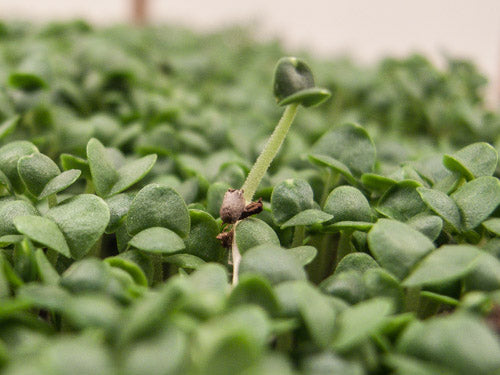
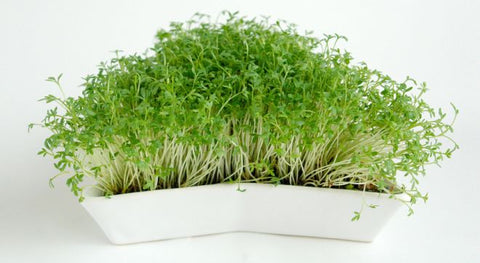
There are some nowadays who want a Micro-Green to be a plant which puts out a True Leaf before they'll call it a Micro-Green.   We find that concept Very interesting, so we have worked to make that happen.

True Leaves

The first thing is to plant less seed.  Just how much is the question.  The general rule is this: The more space your plant has to grow roots - the bigger it can grow. We are currently using 1/4 teaspoon in a 5x5 inch tray.  That leaves quite a bit of room between the seeds-plants, but gives them enough space to grow to the True Leaf stage.  This can take 2 weeks or more.   The main thing that is needed is More Light.  Plants get "leggy" when they need to reach for light.  We use that to our advantage in all other circumstances in the Sprout World, but here we want to minimize the legginess of the plants.  If you can put a light right above your crop -  or keep it in direct sunlight, that will help.  Keep everything adequately moist. Remember - the more light the faster the medium and plants will dry.  This may sound like a lot more work, but really it isn't much more than usual. We cover the seeds only until they have sprouted when growing this way.  We plant on Coconut Coir (which hold moisture like nothing else we've ever worked with)  enriched with 25% Earthworm Castings, which add nitrogen that a plant uses to grow leaves.  When making up the mix,  do not exceed 25% Earthworm Castings as too much nitrogen can burn your plants (they actually whither and die when the soil is too "hot" - which means it has too much nitrogen).   Mix the castings into the base  Coconut Coir, or soil (any kind will work, though we do not advise mixes that are heavily peat moss as we find it hard to work with and we don't find the crop turns out as well) - it is the roots that will need access to the rich medium. 
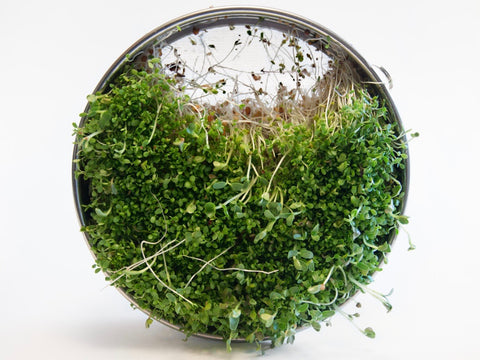
If growing a mix, not all of the plants will grow True Leaves at the same time.  Keep growing until most have them.  Harvest then and eat them up.  Though you can store Micro-Greens,  they degrade quickly, and since you have put so much work in these - you should enjoy them at their peak.

The Next Variation

The next obvious step (to us anyway) we find really exciting.  It is to grow even fewer seeds into even fewer plants.  Those plants will grow more leaves.  They will be more like Baby-Greens than Micro-Greens.  They will require more time. They may re-grow more quickly because they'll have a bigger root-mass. The container (tray, pot, etc.) they grow in will likely be too small for that root-mass to live long, but it's possible.  When it comes right down to it, we're talking about an indoor-garden.  All the other stuff we offer is about indoor gardening, but this is more like a garden.  Not many of us have space in our homes to Garden inside, but we love the idea.  We're working on this, and we'll tell you what we find out as soon as we know something.  It was gardening that eventually led us to sprouting.  We feel like this is closing that circle started so long ago - now it is sprouting leading back to gardening @:-)  Start with Coconut Coir enriched with Earthworm Castings and you'll have a  great experience.  Happy Micro-Greening!

Recommended Sprouters for Basil Micro-Greens

  1. Tray Set - Single Crop

    Tray Set - Single Crop

    Rating:
    100%
    $18.00
  2. Organic Hemp Bag Sprouter

    Organic Hemp Bag Sprouter

    Rating:
    96%
    $14.95
    Out of stock
  3. Compostable Sprouting Tray Set

    Compostable Sprouting Tray Set

    $2.75 / Units
  4. Euro Tray Sprouter

    Euro Tray Sprouter

    Rating:
    100%
    $40.40 / Units
  5. Stainless Steel Sprouter

    Stainless Steel Sprouter

    Rating:
    98%
    $26.50 / Units
  6. The three 10x10 Trays that make up our 1/2 Crop Tray Set.

    Tray Set - 1/2 Crop

    $14.00 / Units
  7. The 4 Crop Tray Set includes a Solid 10x10 Tray and eight 5x5 Trays - 4 for Growing and 4 as Covers.

    Tray Set - 4 Crop

    $13.50 / Units
  8. small Stainless Steel Sprouter

    small Stainless Steel Sprouter

    Rating:
    100%
    $22.00 / Units
  9. Master Microgreens Kit

    Master Microgreens Kit

    $96.69 / Units
Write Your Own Review
Only registered users can write reviews. Please Sign in or create an account
© 2021 Sproutpeople